
The plate is your printer's bed, drawn to size. Everything you put on it prints together. Model is where you add models, place them and choose how they print.
Put a model on the plate
Open a model.
Press Add model, press Cmd+O (Ctrl+O on Windows and Linux), or drag files from your computer onto the window. SlicerX opens STL, 3MF, OBJ, AMF and STEP files, several at once if you like, and repairs small mesh errors as it opens them. A 3MF project opens with its plates and settings.
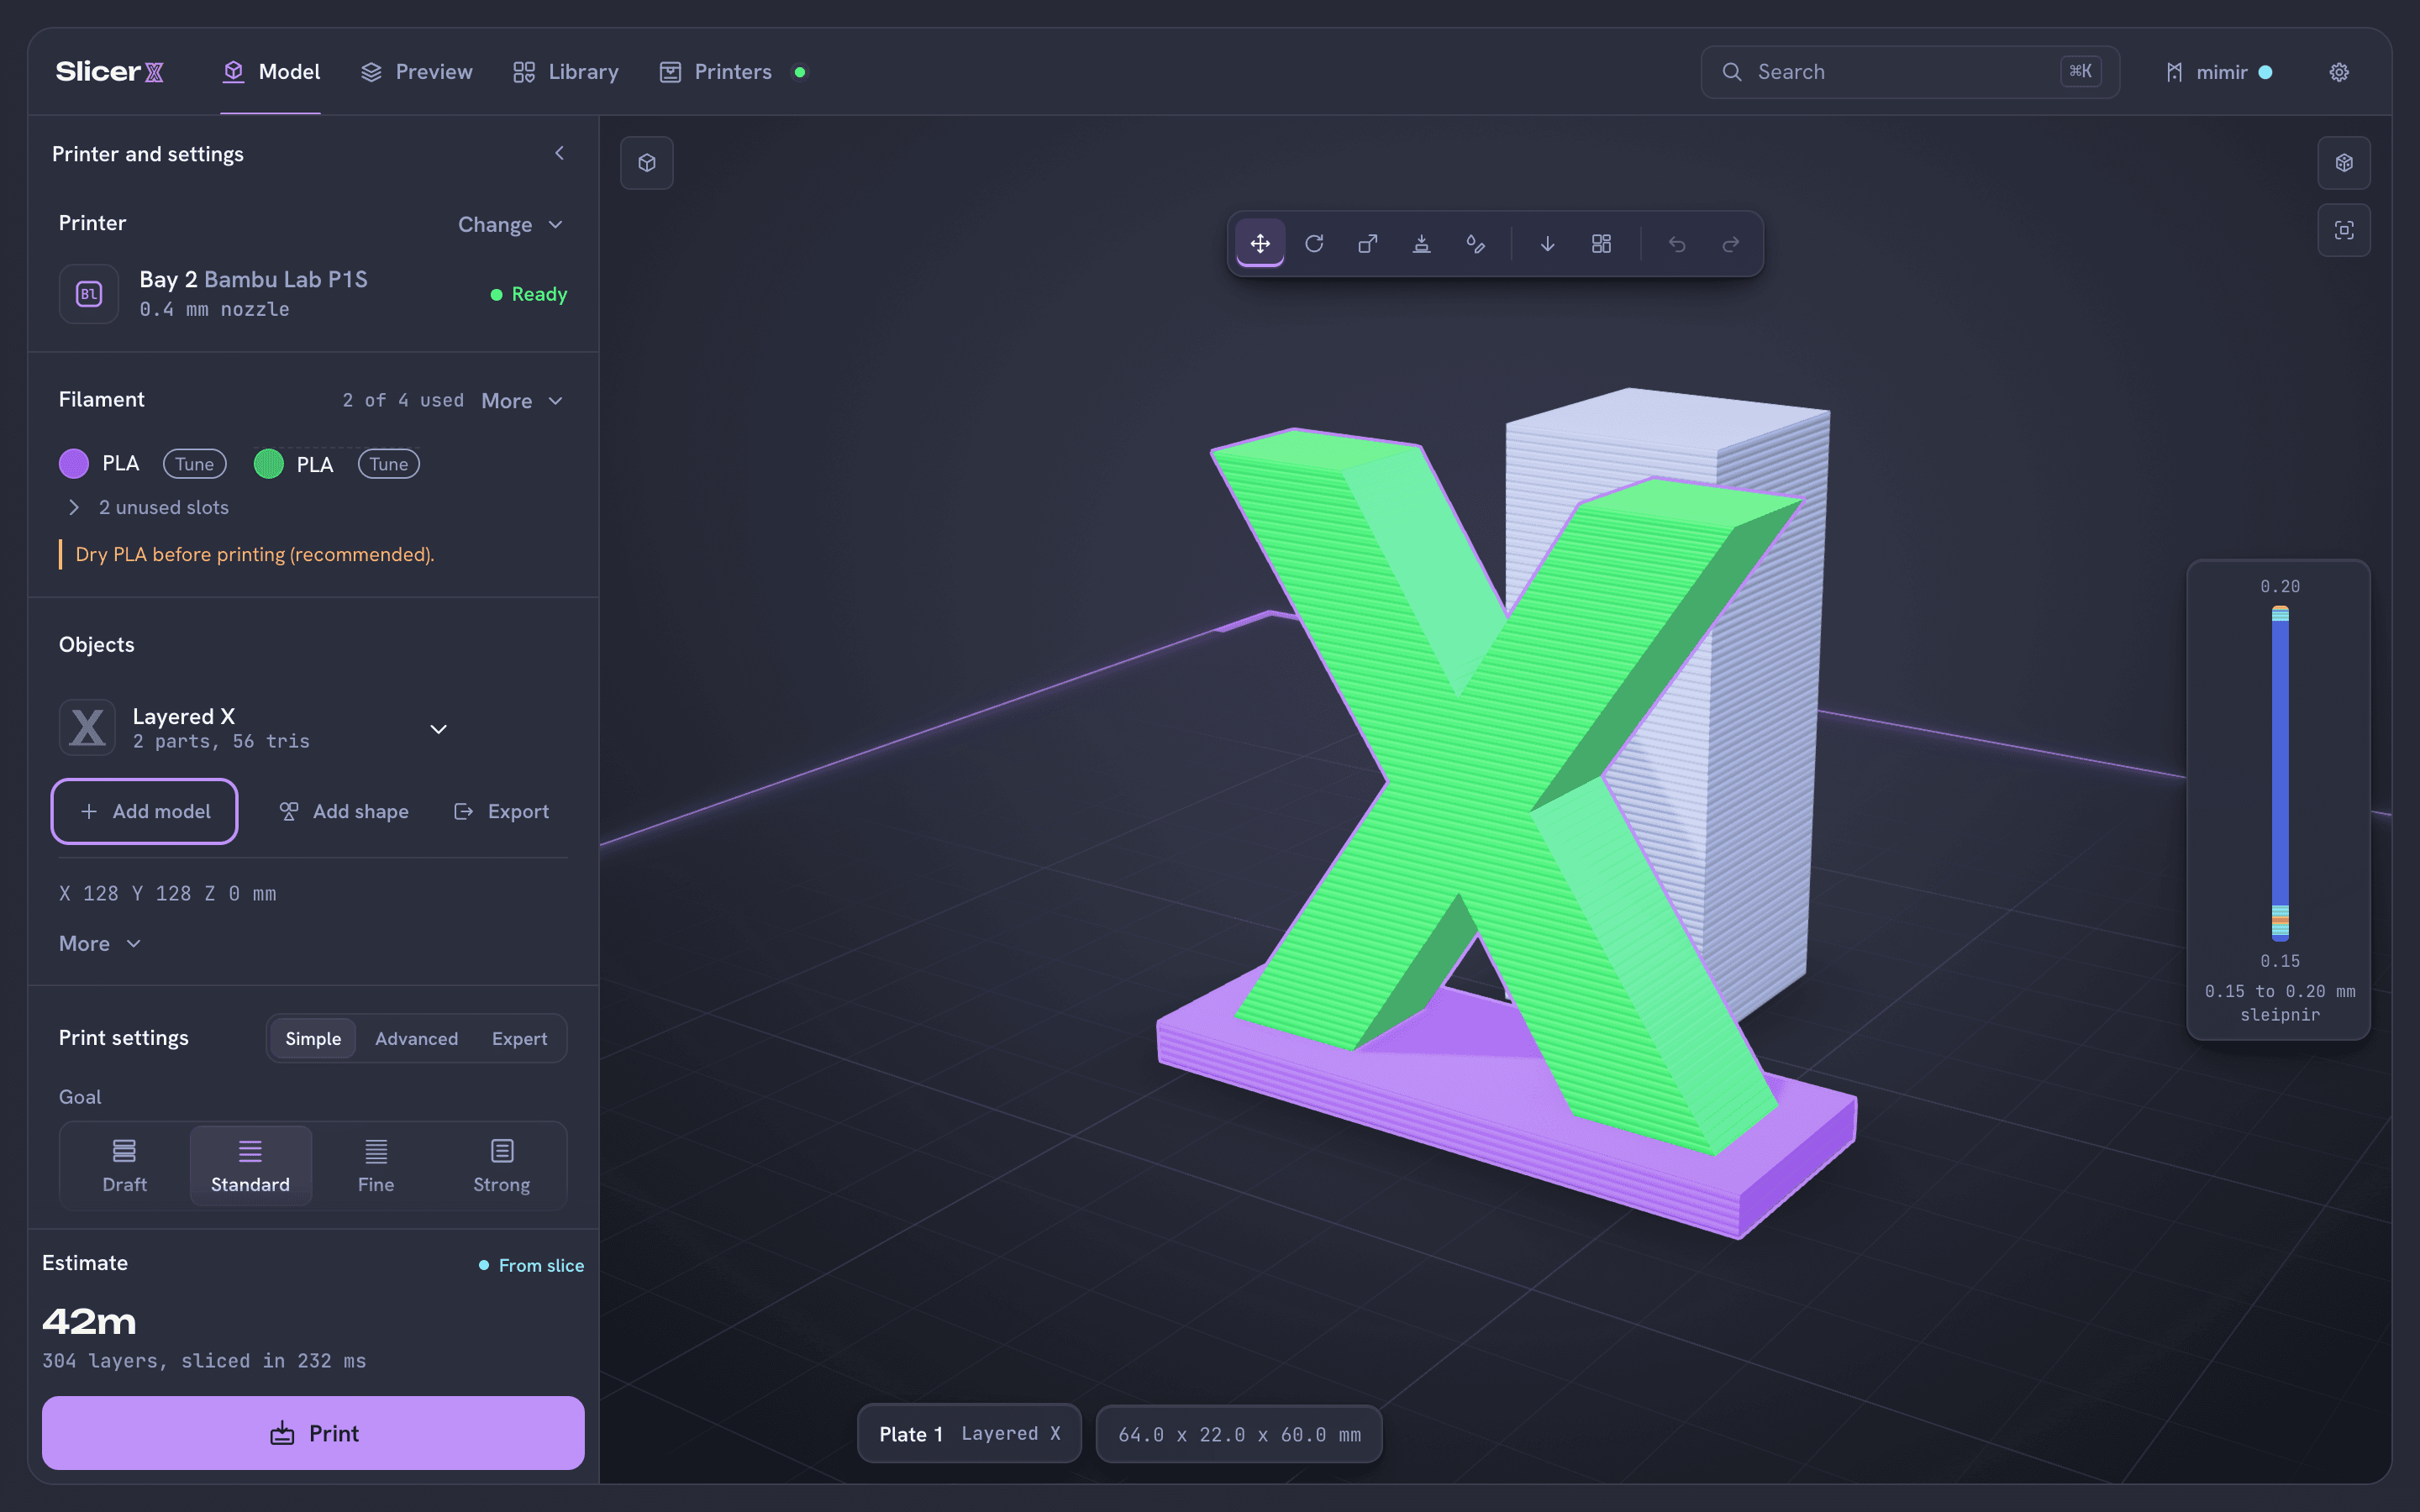
A model on the plate. Add model opens more. Place it.
The toolbar over the plate has Move, Rotate, Scale and Lay on face, which turns the model so the face you click sits flat on the bed. A flat face down usually prints best. With more than one model, Arrange all spreads them out with a gap between each, and Arrange options sets the gap, lets models turn, or arranges only the selection. Auto orient, in the Tools menu of the Objects section, turns a selected model to need the least support.
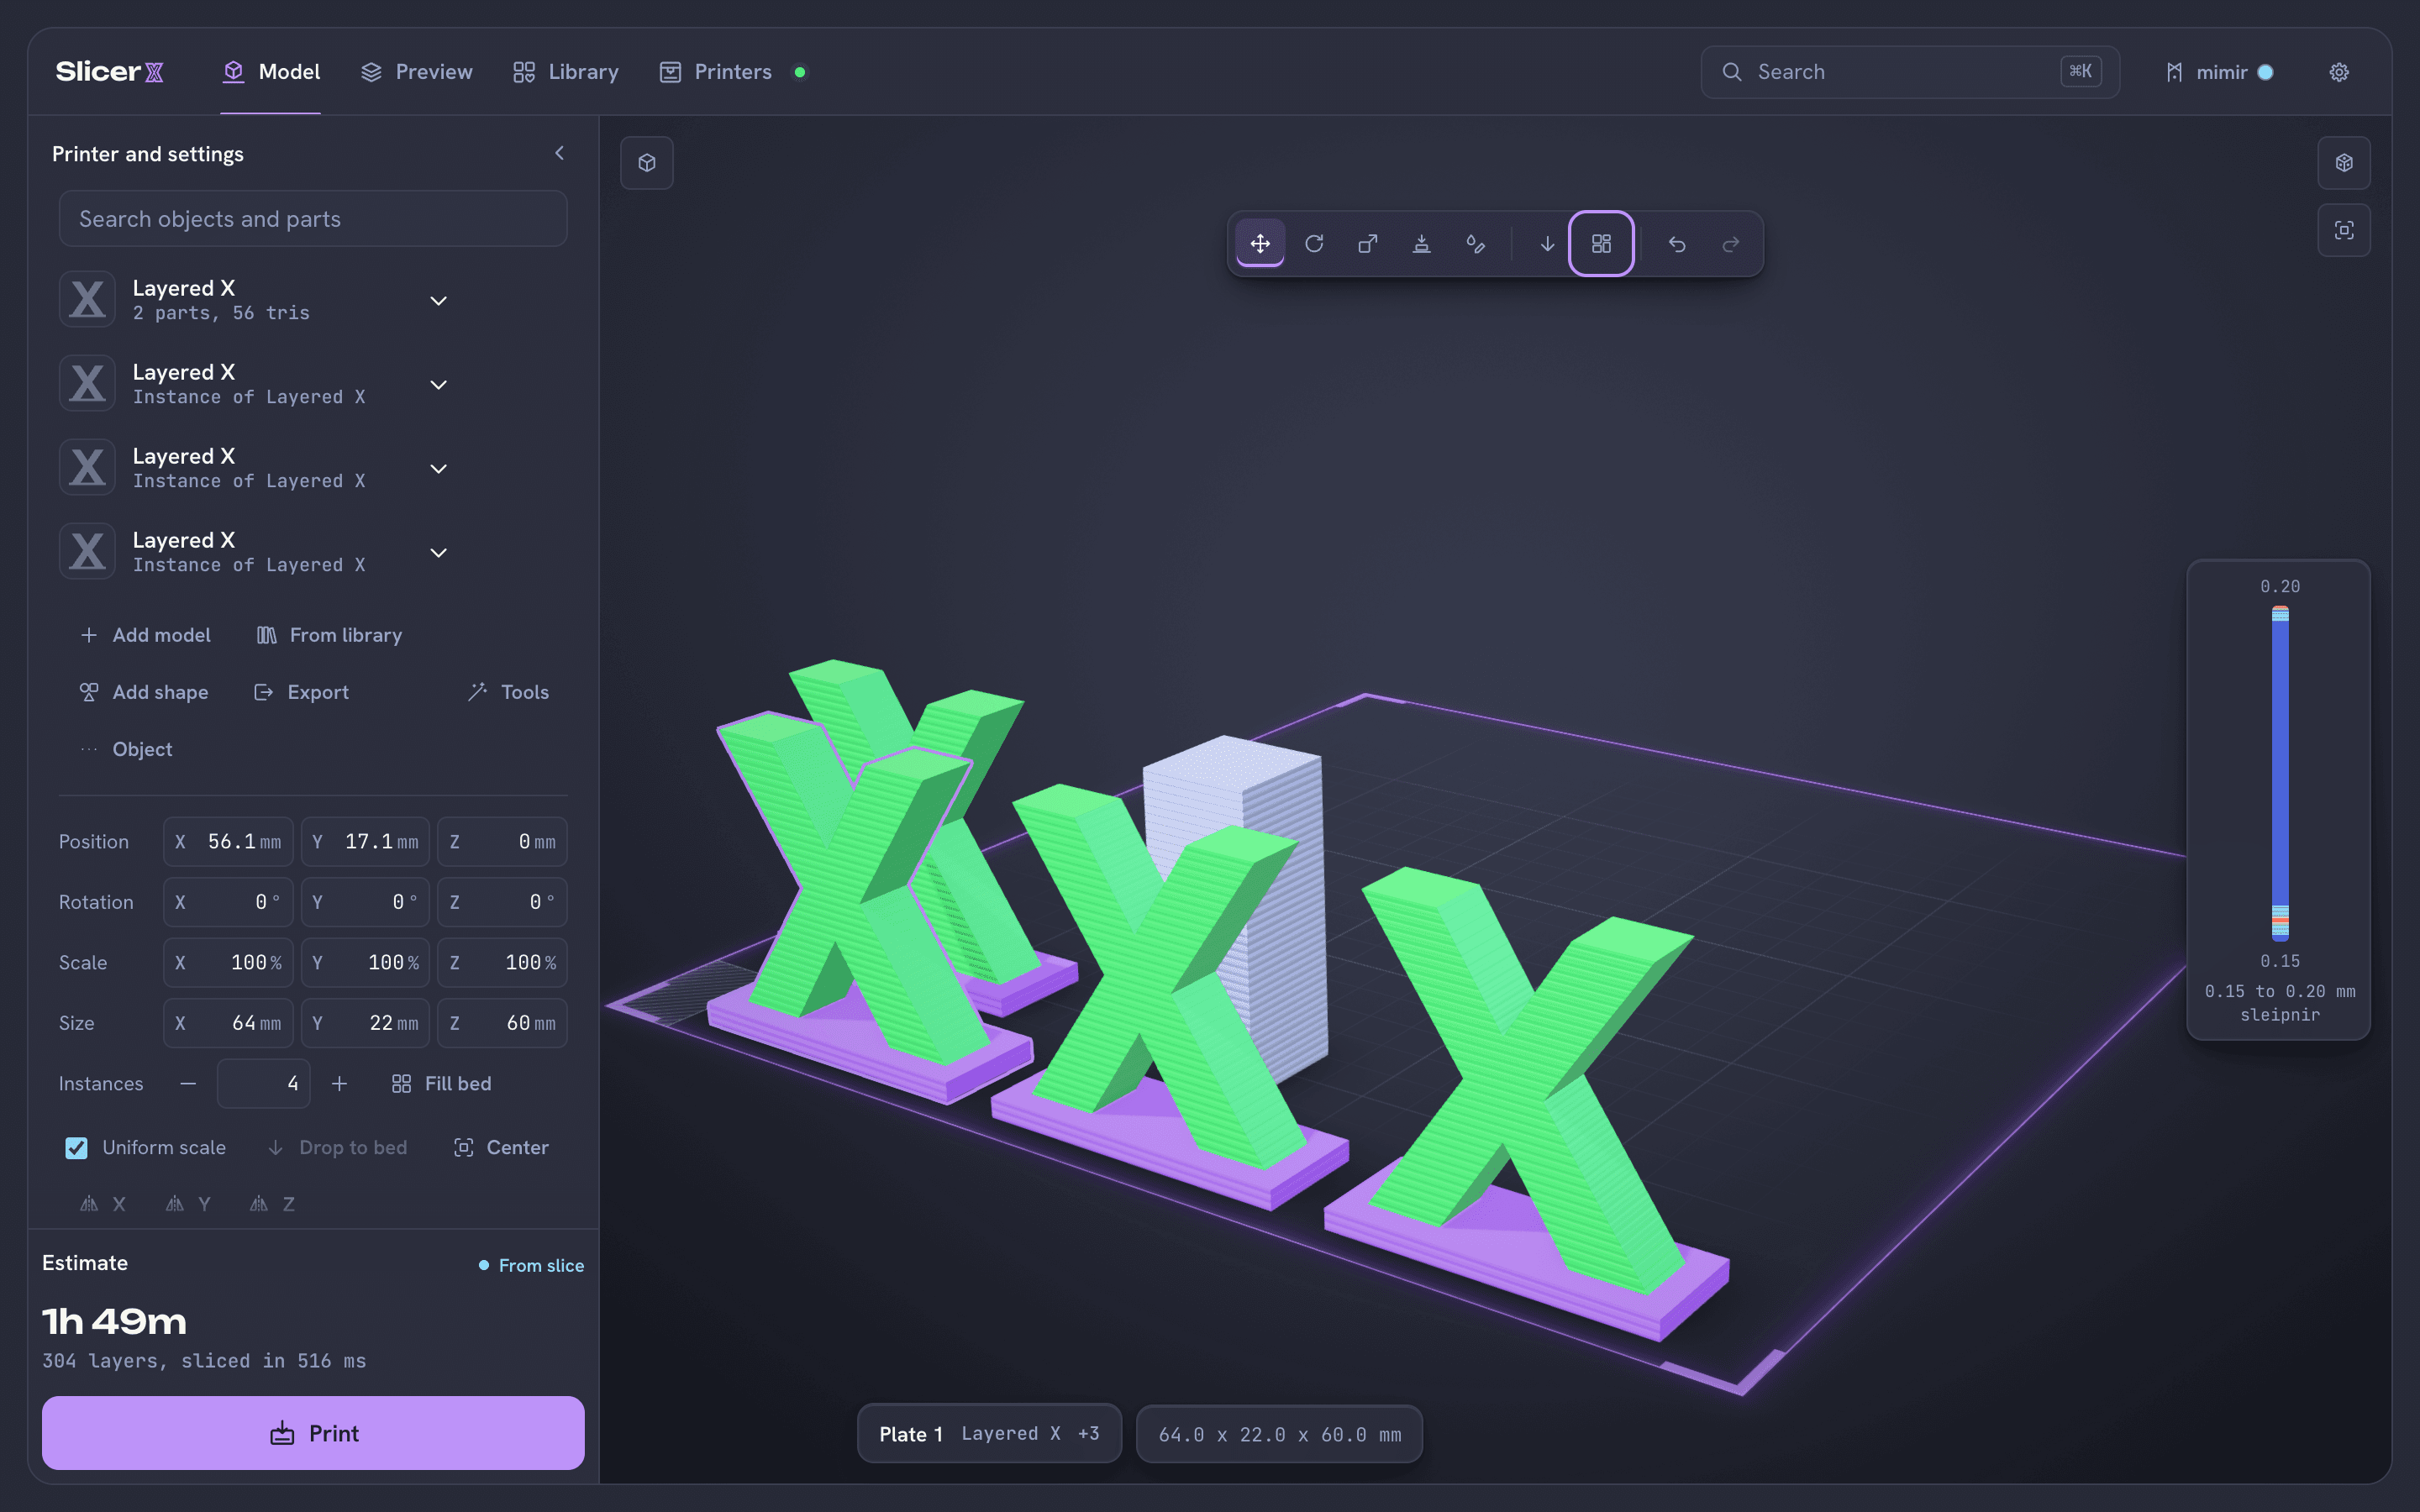
Arrange all spaces the models evenly on the plate.
Choose how it prints
Pick a goal.
Under Print settings, Goal sets everything at once:
Goal Pick it when Draft You want a quick test print and do not mind visible layers Standard Most everyday prints Fine The surface matters, such as figures and curved parts Strong The part has to carry load, such as brackets and hooks 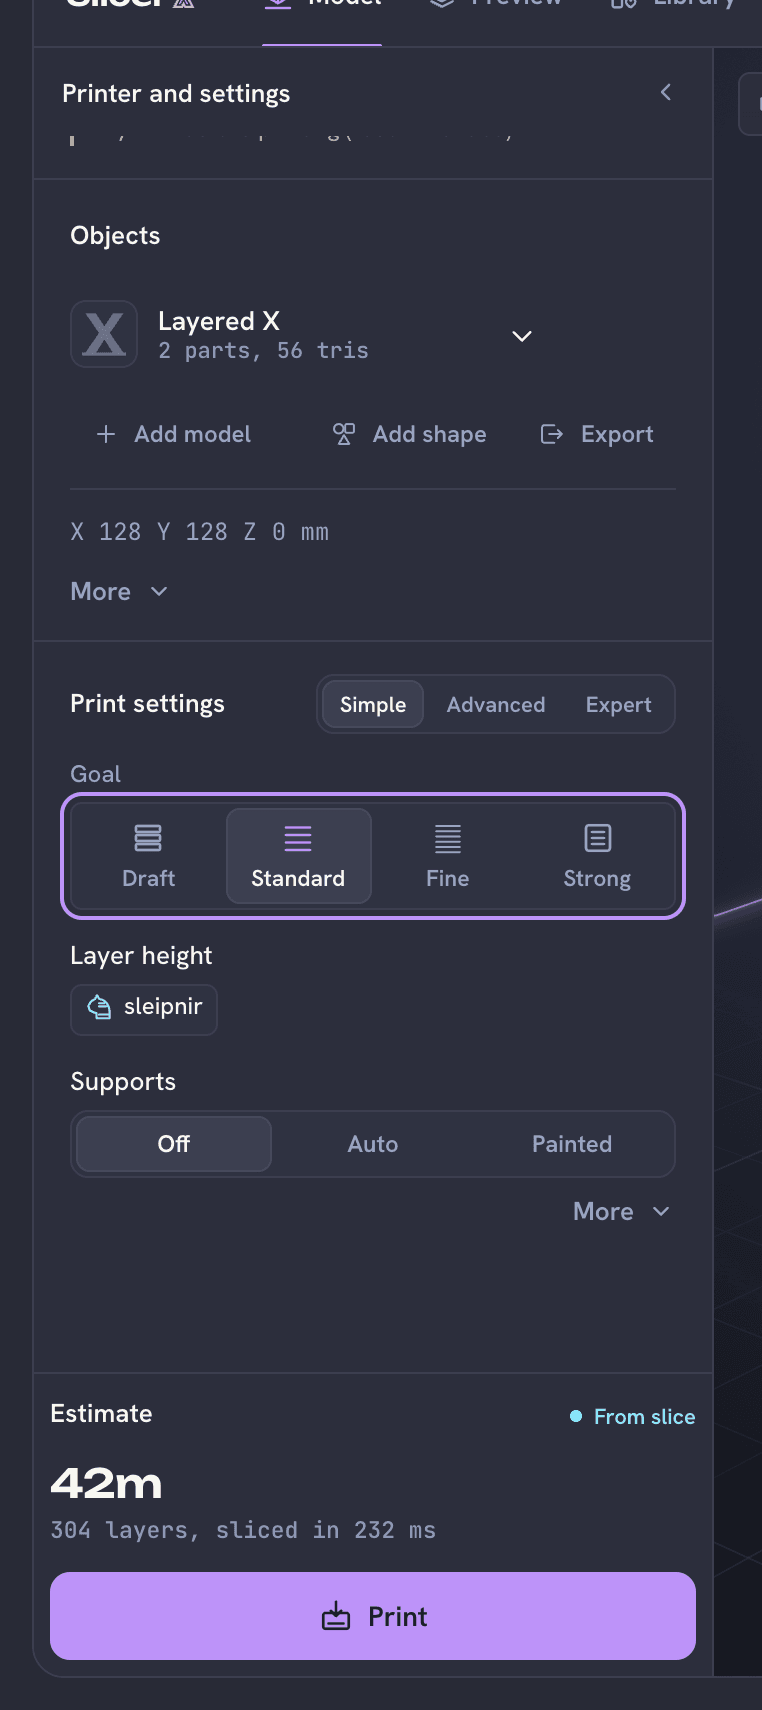
The goal is the one setting most prints need. Change a setting if you need to.
Layer height and Supports sit under the goal, and More shows Strength, Speed and Brim. The pane starts in Simple mode; Advanced and Expert at its top show more settings when you want them. Changing a setting turns the goal into a custom mix, which is fine.
Layer height is how thick each layer is. Thinner layers look smoother and take longer.
Supports hold up parts of the model that would otherwise print in mid-air, like the underside of an arm: Off, Auto, or Painted, where you paint where they go.
Speed runs from Quality to Fastest.
Strength sets the walls and the infill, the pattern that fills the inside, from 2 walls up to 6.
Brim adds a thin flat ring around the bottom that helps small feet stick to the bed.
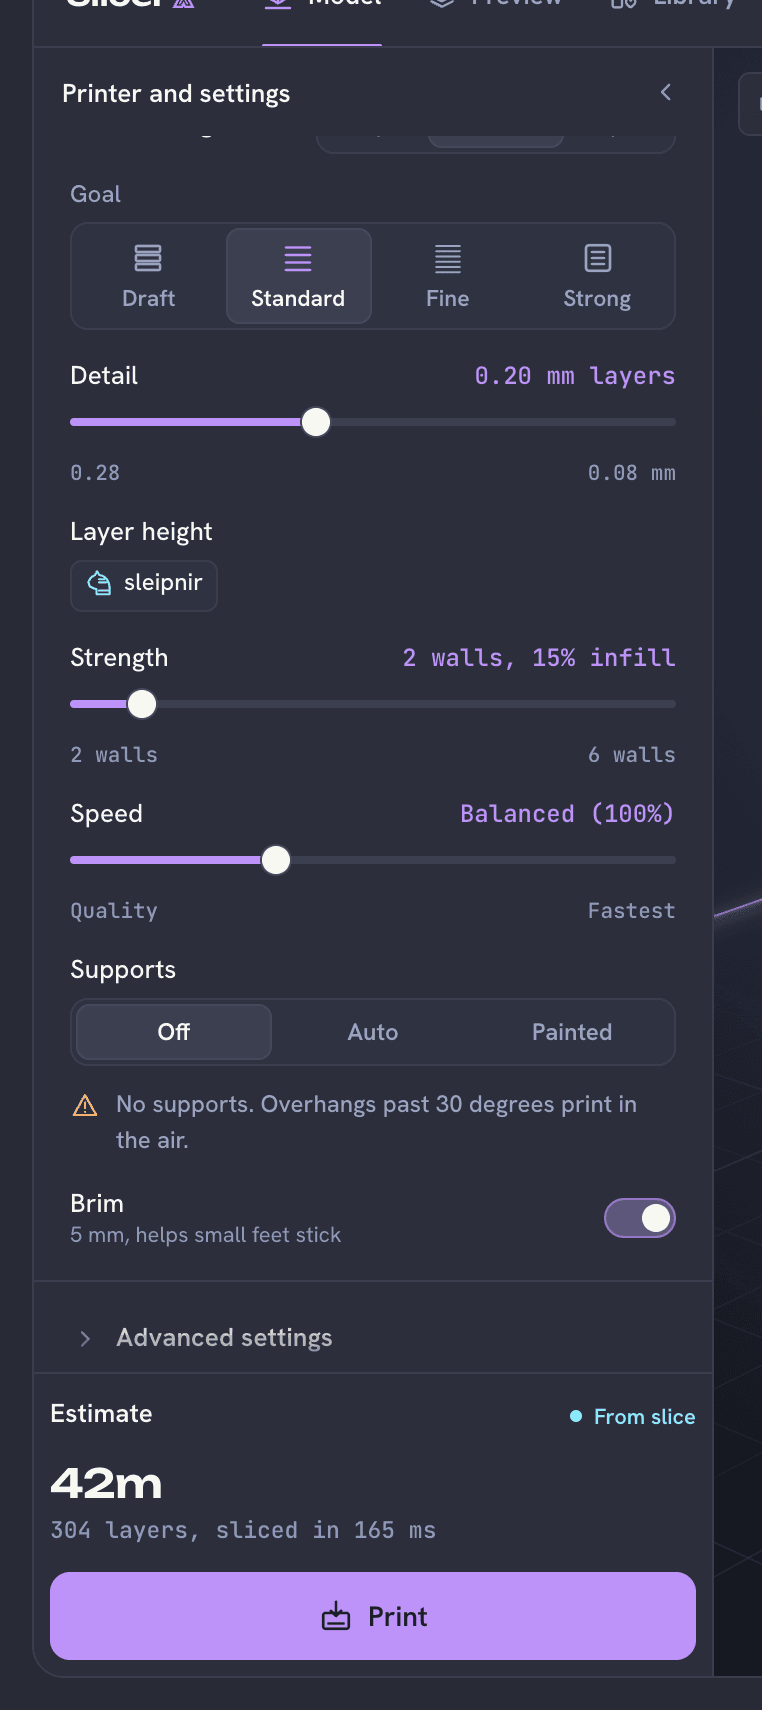
Most prints need nothing beyond these.
Check for print risks
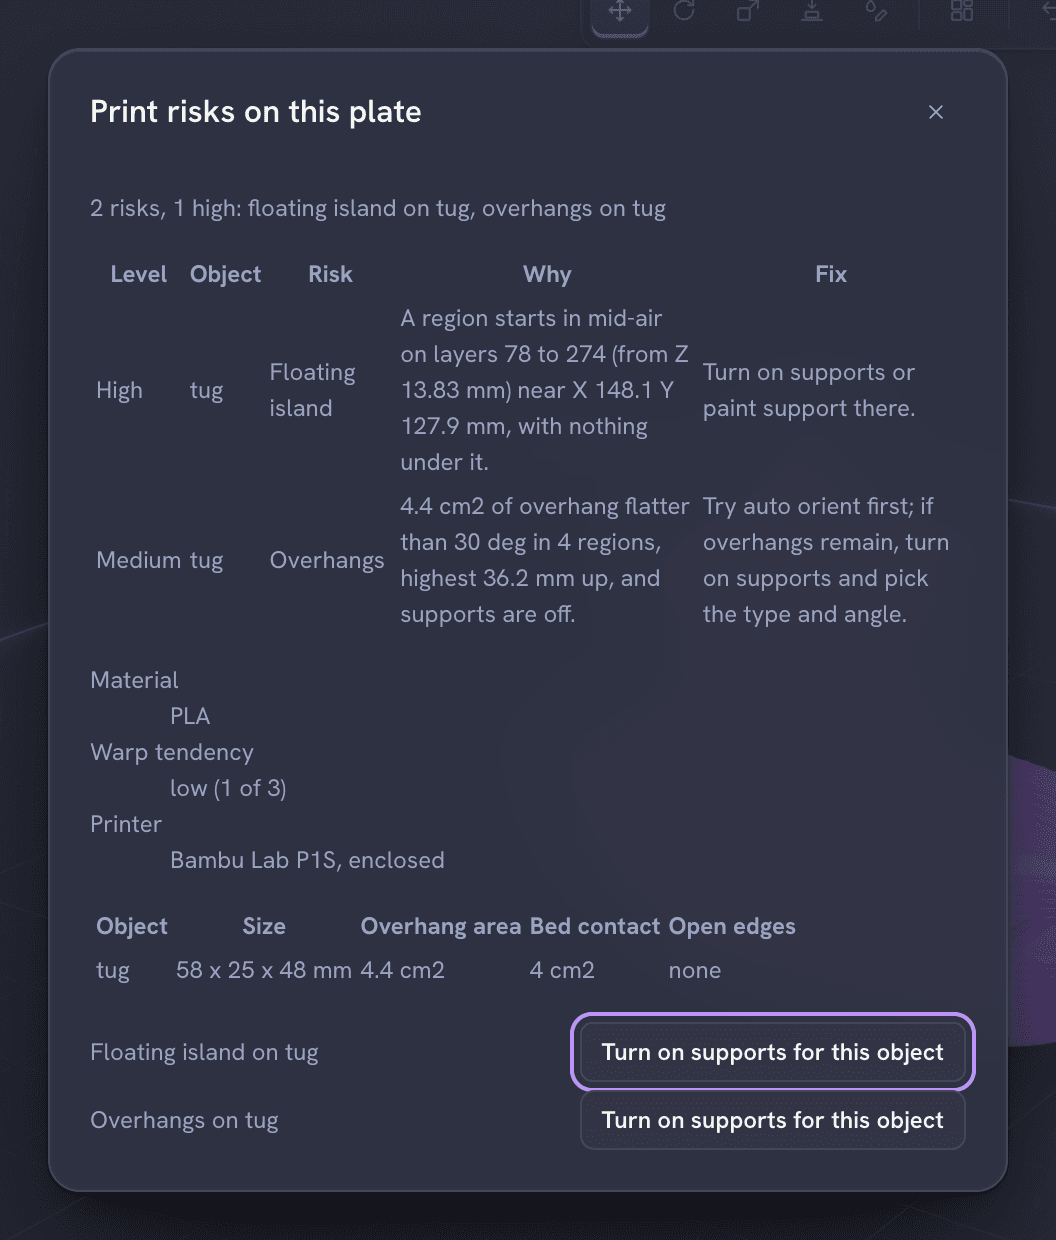
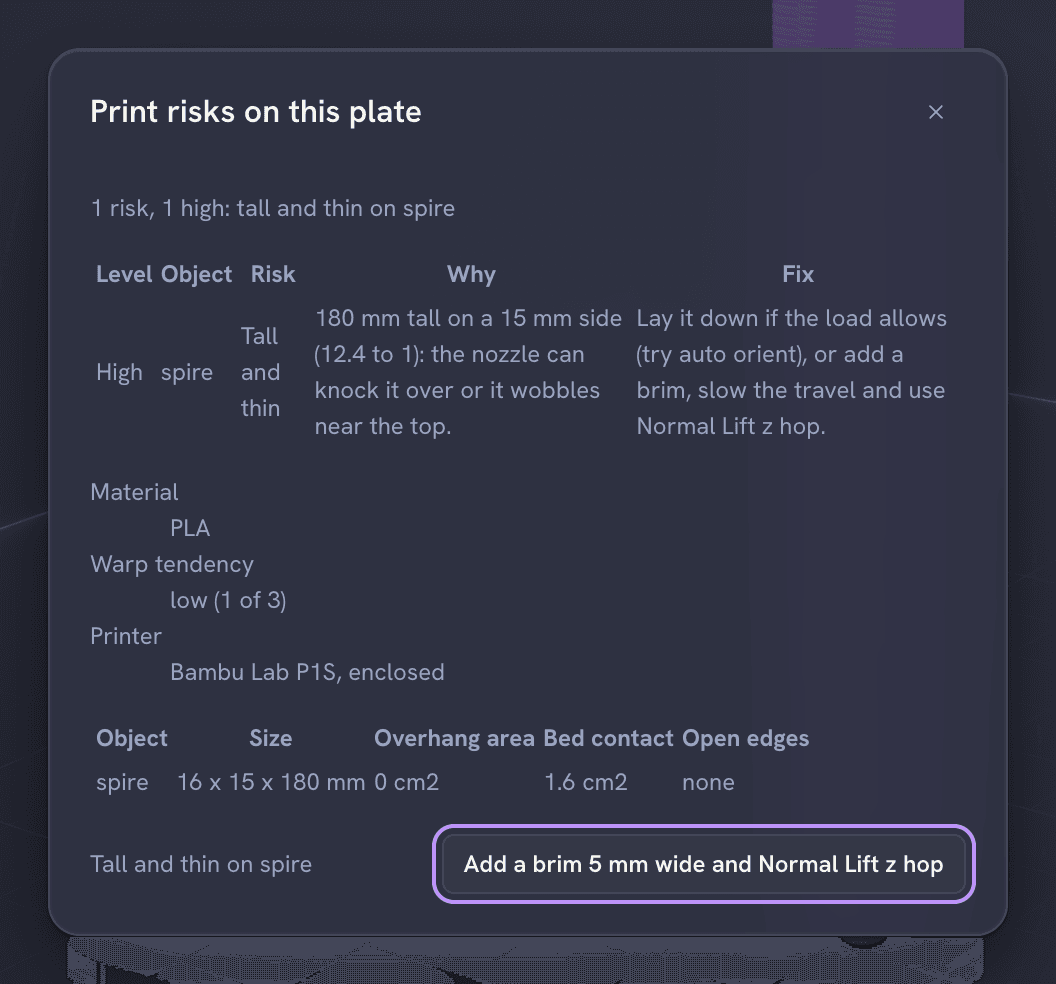
Before you print, SlicerX can look over the plate for things that often go wrong. Open the command bar (Cmd+K) and choose Check the plate for print risks. If the plate changed since the last slice, it slices first, then Print risks on this plate lists what it finds for each object, with how serious it is, where it is and why:
Warping, a tall and thin part, overhangs, open edges or small bed contact.
Thin walls: a feature narrower than the walls can print.
Floating island: a region that starts in mid-air, with nothing under it.
Long bridge: a span that may sag. SlicerX tells a bridge from an overhang: a bridge held up at both ends is fine up to the maximum bridge length, 10 mm by default, and a longer one gets a warning with its span.
It also shows the material and its warp tendency, the printer, and each object's size, overhang area, bed contact and open edges.
Each risk has a button that fixes it:
Add a brim 5 mm wide, or wider, for a part likely to warp or tip over.
Turn on supports for this object when its overhangs, a floating island or a long bridge need them. When a finding is not on one object, Turn on supports turns them on for the whole plate.
Use Arachne walls for this object for thin walls, when the part uses the classic wall generator.
Normal Lift z hop for a tall, thin part, so the nozzle lifts as it travels and does not knock the part over.
Repair the mesh for a model with open edges.
A brim, supports or Arachne walls go only on the object that needs them, unless the finding belongs to the plate, and a brim only ever gets wider. z hop is a printer setting, so it applies to the whole plate. A fix that is already in place shows Applied. Applying a fix does not slice or print anything; you go on as usual.
Paint fuzzy skin
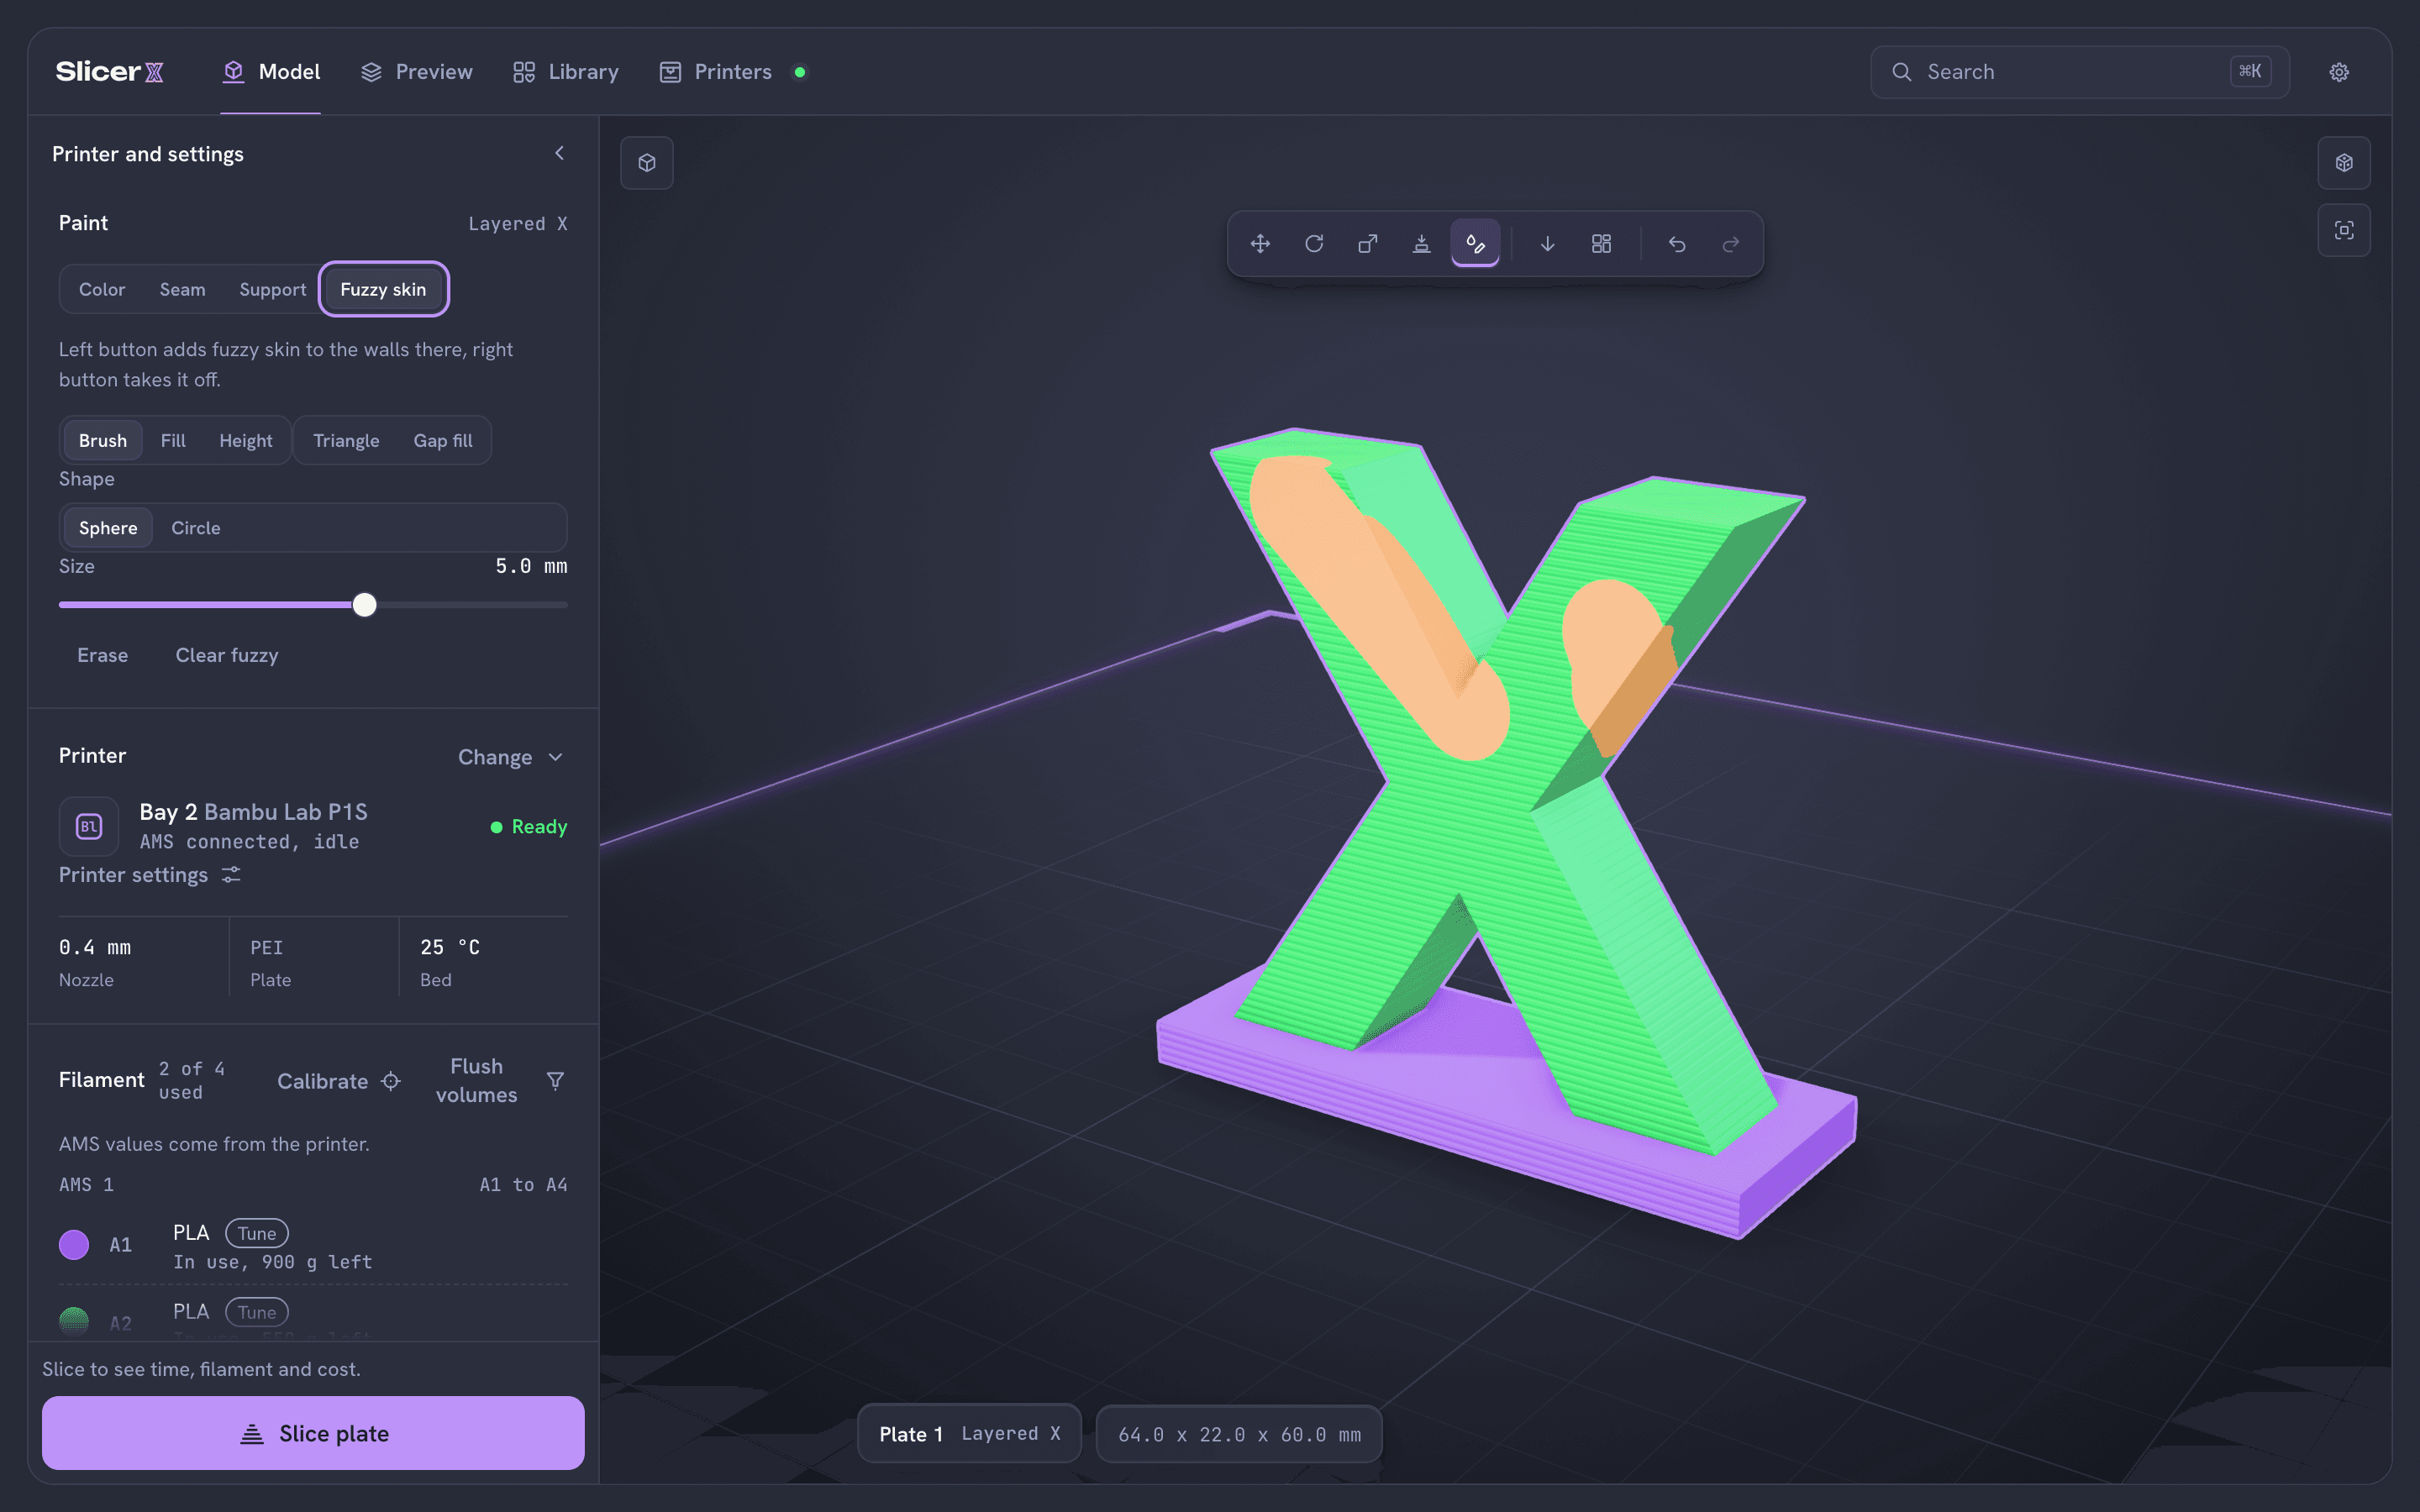
Fuzzy skin roughens a wall with tiny random moves of the nozzle, for grip or to hide layer lines. You can paint it onto just the walls that need it.
Pick Fuzzy skin.
Choose Paint in the toolbar over the plate, then Fuzzy skin among Color, Seam, Support and Fuzzy skin. "Paint fuzzy skin" in the command bar does both at once.
Paint the walls.
The left button adds fuzzy skin to the walls you brush over, and the right button takes it off. Only the painted walls get the texture. If fuzzy skin is off for that object, the first stroke turns it on for the painted areas only and says so.
Painted fuzzy skin is saved in the 3MF the way OrcaSlicer and Bambu Studio write it, so a file painted in either of them slices the same in SlicerX.
Cut with connectors
The cut tool splits a model with a plane, for example to print a large part in pieces. Select a model and open Cut from Tools in the Objects section, or "Cut the selected object with a plane" in the command bar. Connectors keep the pieces lined up when you glue them back together.
Choose the connectors.
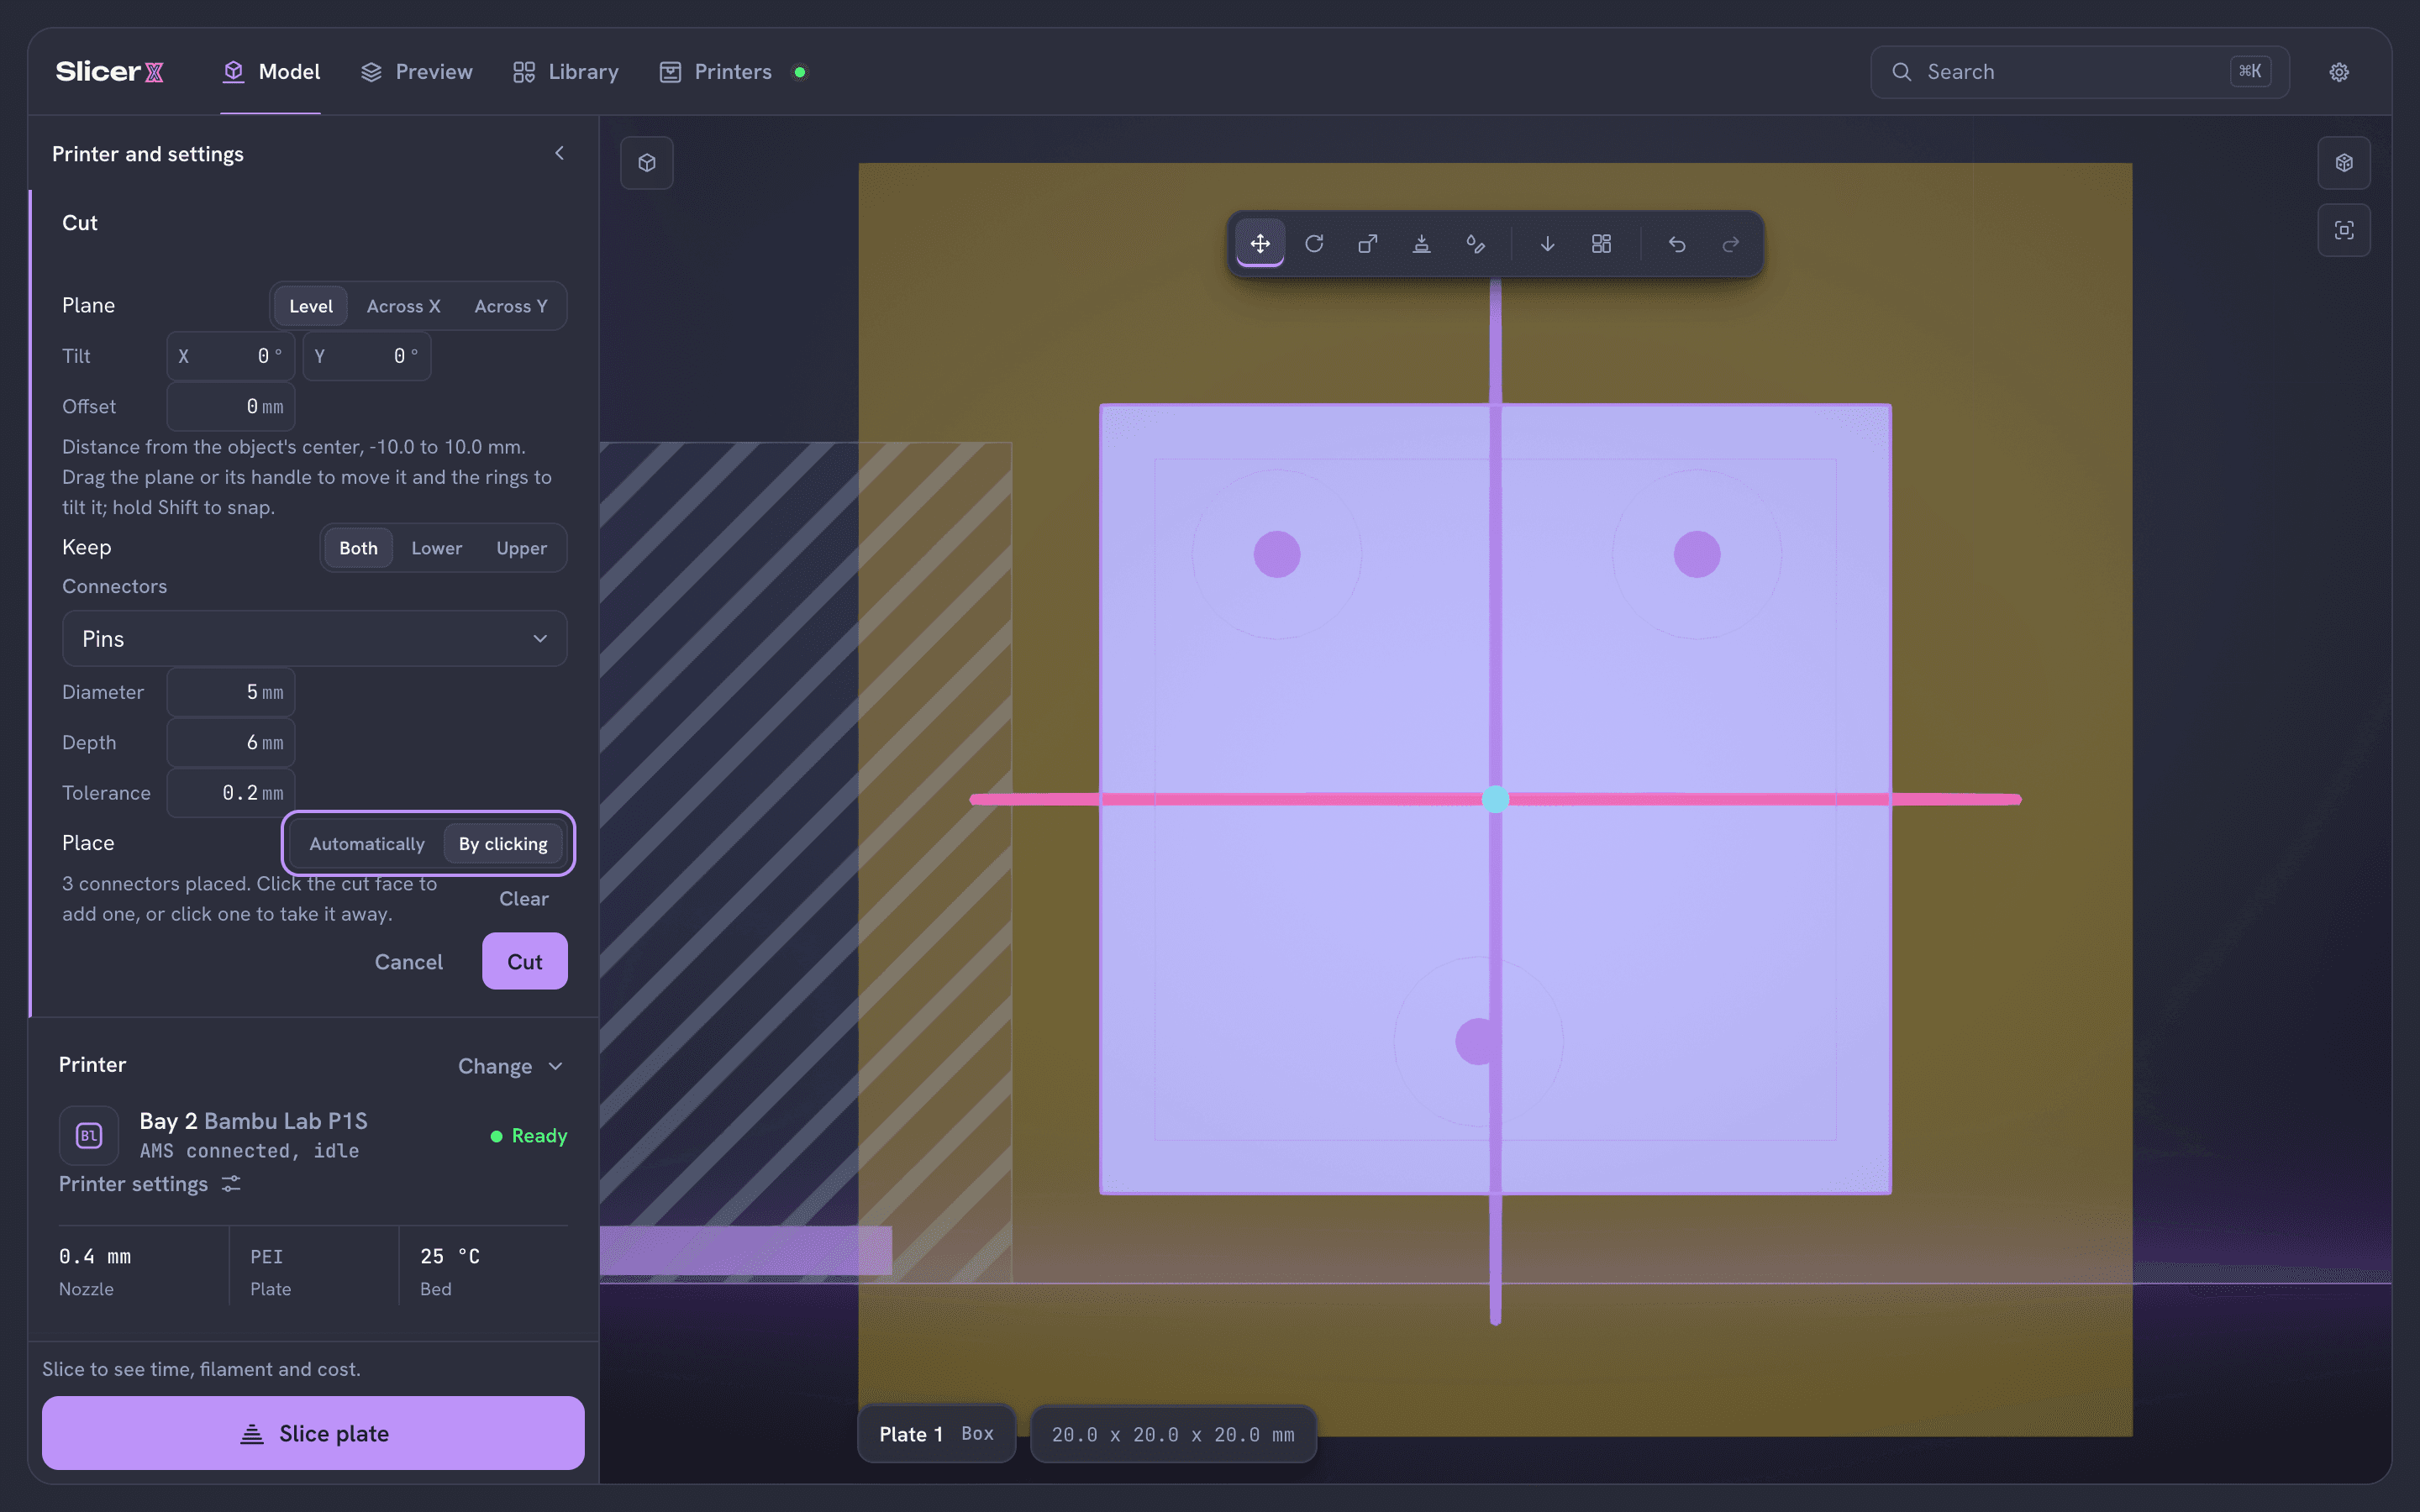
Under Connectors, pick Pins, Dowels (printed separately) or Dovetail. Diameter (Width for a dovetail), Depth and Tolerance are in millimeters. Tolerance is the gap that lets the pieces fit together.
Place them.
For pins and dowels, Place puts them in Automatically, or By clicking: click the cut face to add a connector there and click one again to take it away. Clear removes them all. With none placed, they go in automatically.
The connectors show as circles of their size on the cut face and follow the plane as you move or tilt it. Cutting ends the object's CAD history, and the pieces start without one.
Where aegis, sleipnir and atlas show up
SlicerX has three features of its own that work in Model. You do not have to turn them on.
sleipnir
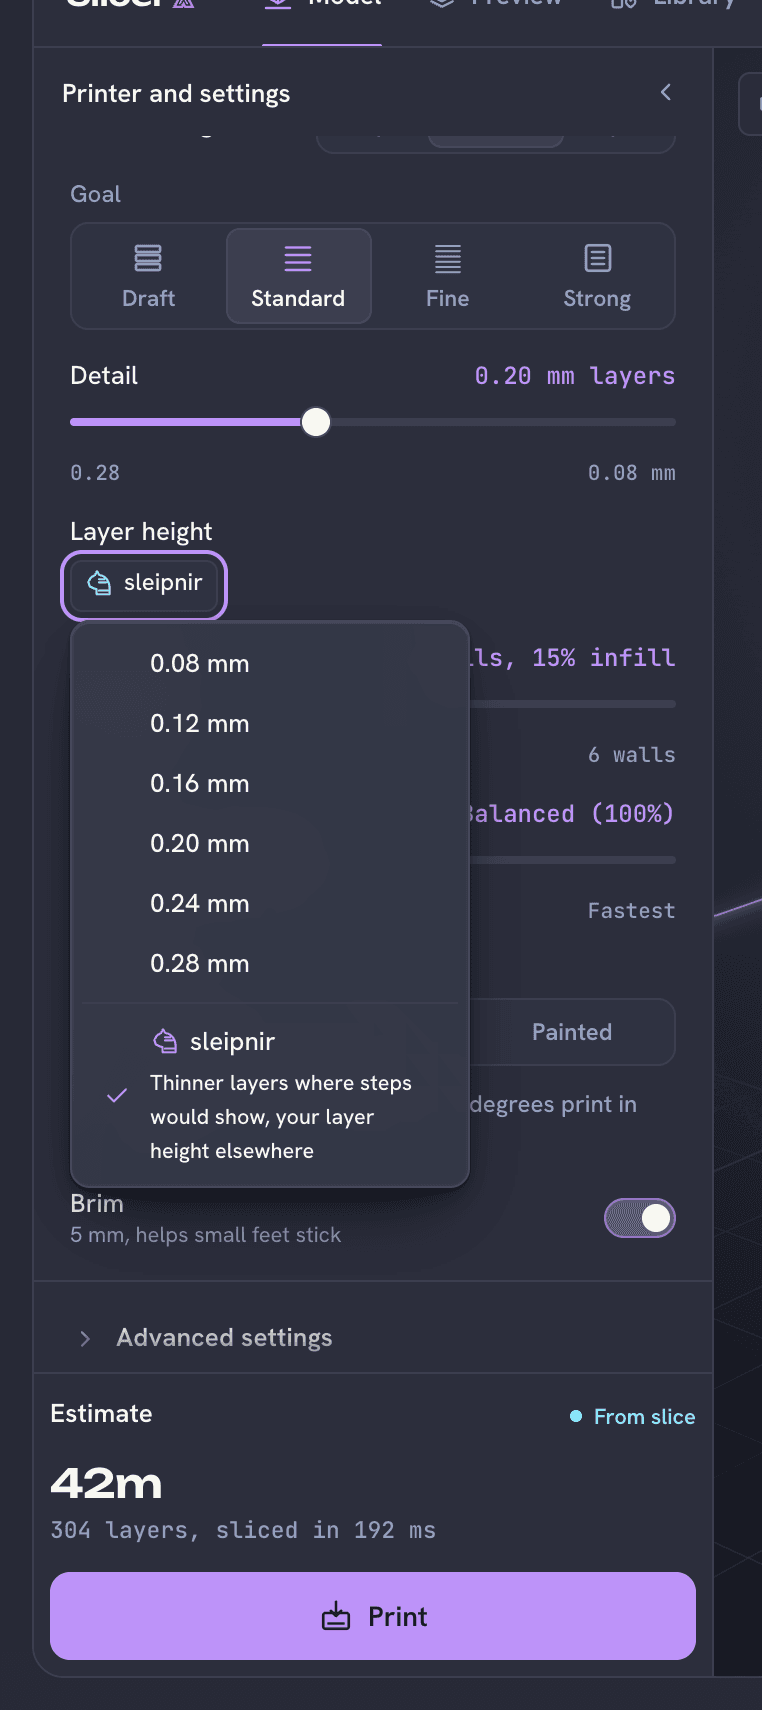
sleipnir changes the layer height with the shape of the part, using thinner layers on curves and slopes where steps would show, for a smoother surface. Standard, Fine and Strong use it, and Layer height shows it as sleipnir. Pick a fixed height from that menu to turn it off.
aegis
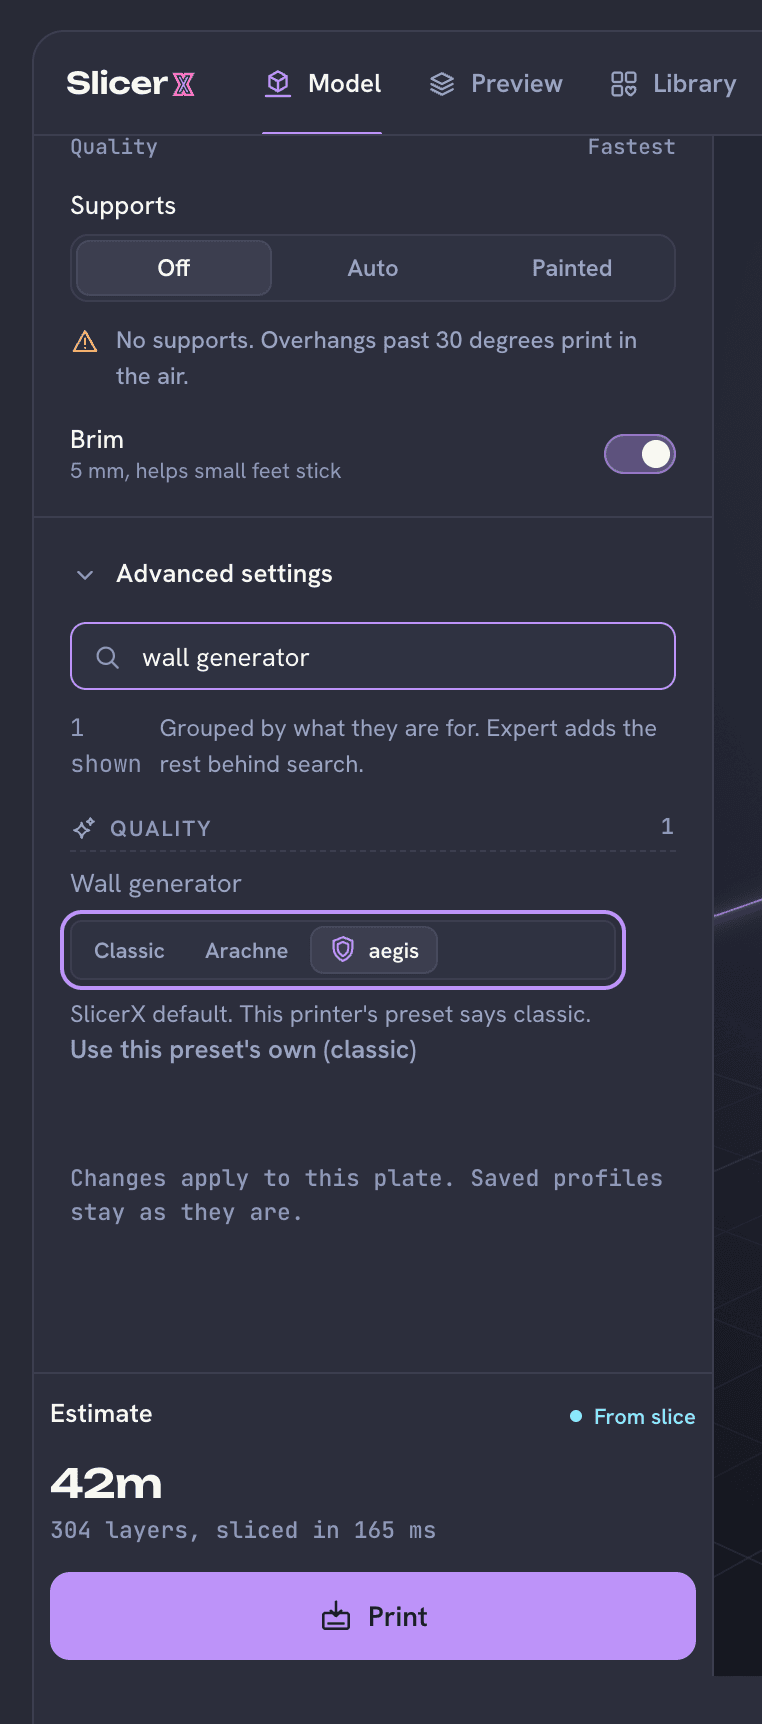
aegis varies the wall width to fit the part, so thin features print solid and walls stay even. It is the SlicerX default for walls, so there is nothing to set. It shows as the Wall generator setting in Advanced and Expert mode.
atlas
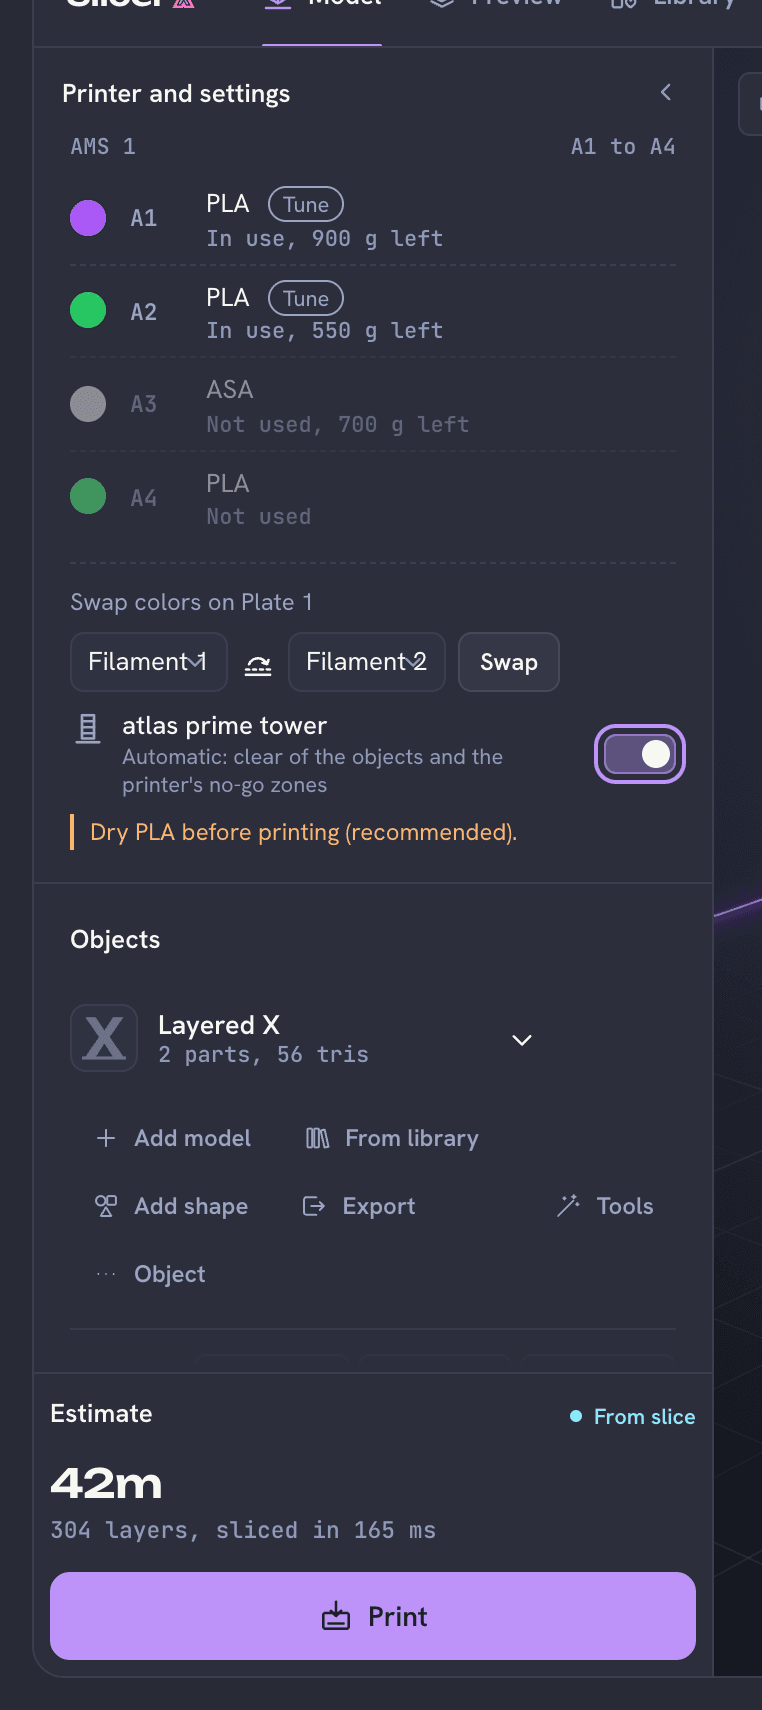
On a plate with more than one filament, the printer prints a small block called a prime tower to clean the nozzle each time it changes color. atlas places that tower for you, clear of your models and the printer's no-go zones. The atlas prime tower switch is in the Filament section once the plate uses two or more filaments (in Simple mode, press More there). Turn it off to drag the tower yourself or type where it goes.
Next
When the plate looks right, slice it and check the result: Preview your slice.