
SlicerX is a slicer: it turns a 3D model into the instructions your printer follows, one thin layer at a time. Those instructions are a file called G-code. You open a model, choose how it should print, slice it, check the result and send it to the printer.
Install
| Computer | Download |
|---|---|
| macOS, Apple silicon and Intel | dmg, signed and notarized |
| Windows, x64 | Installer (.exe) or .msi, signed |
| Linux, x64, Ubuntu 24.04 or newer | AppImage or .deb |
Download it from slicerx.app or the releases page. You can also try it in your browser. SlicerX is free, with nothing to buy.
Set it up
The first time SlicerX opens, a short setup runs: find your printer, then pick how the controls behave. Each screen can be skipped, and Skip, use defaults at the top skips both. You can run it again later from Settings, Look and feel, Run setup again.
Find your printer.
SlicerX scans your local network as soon as the screen opens and shows a card for each printer that answers, with its model, address, nozzle and filament unit when the printer reports them. Turn the printer on and connect it to the same network as your computer first. If yours is missing, press Scan again, or choose Not listed? Add it by hand. No printer yet? Choose I do not have a printer yet.
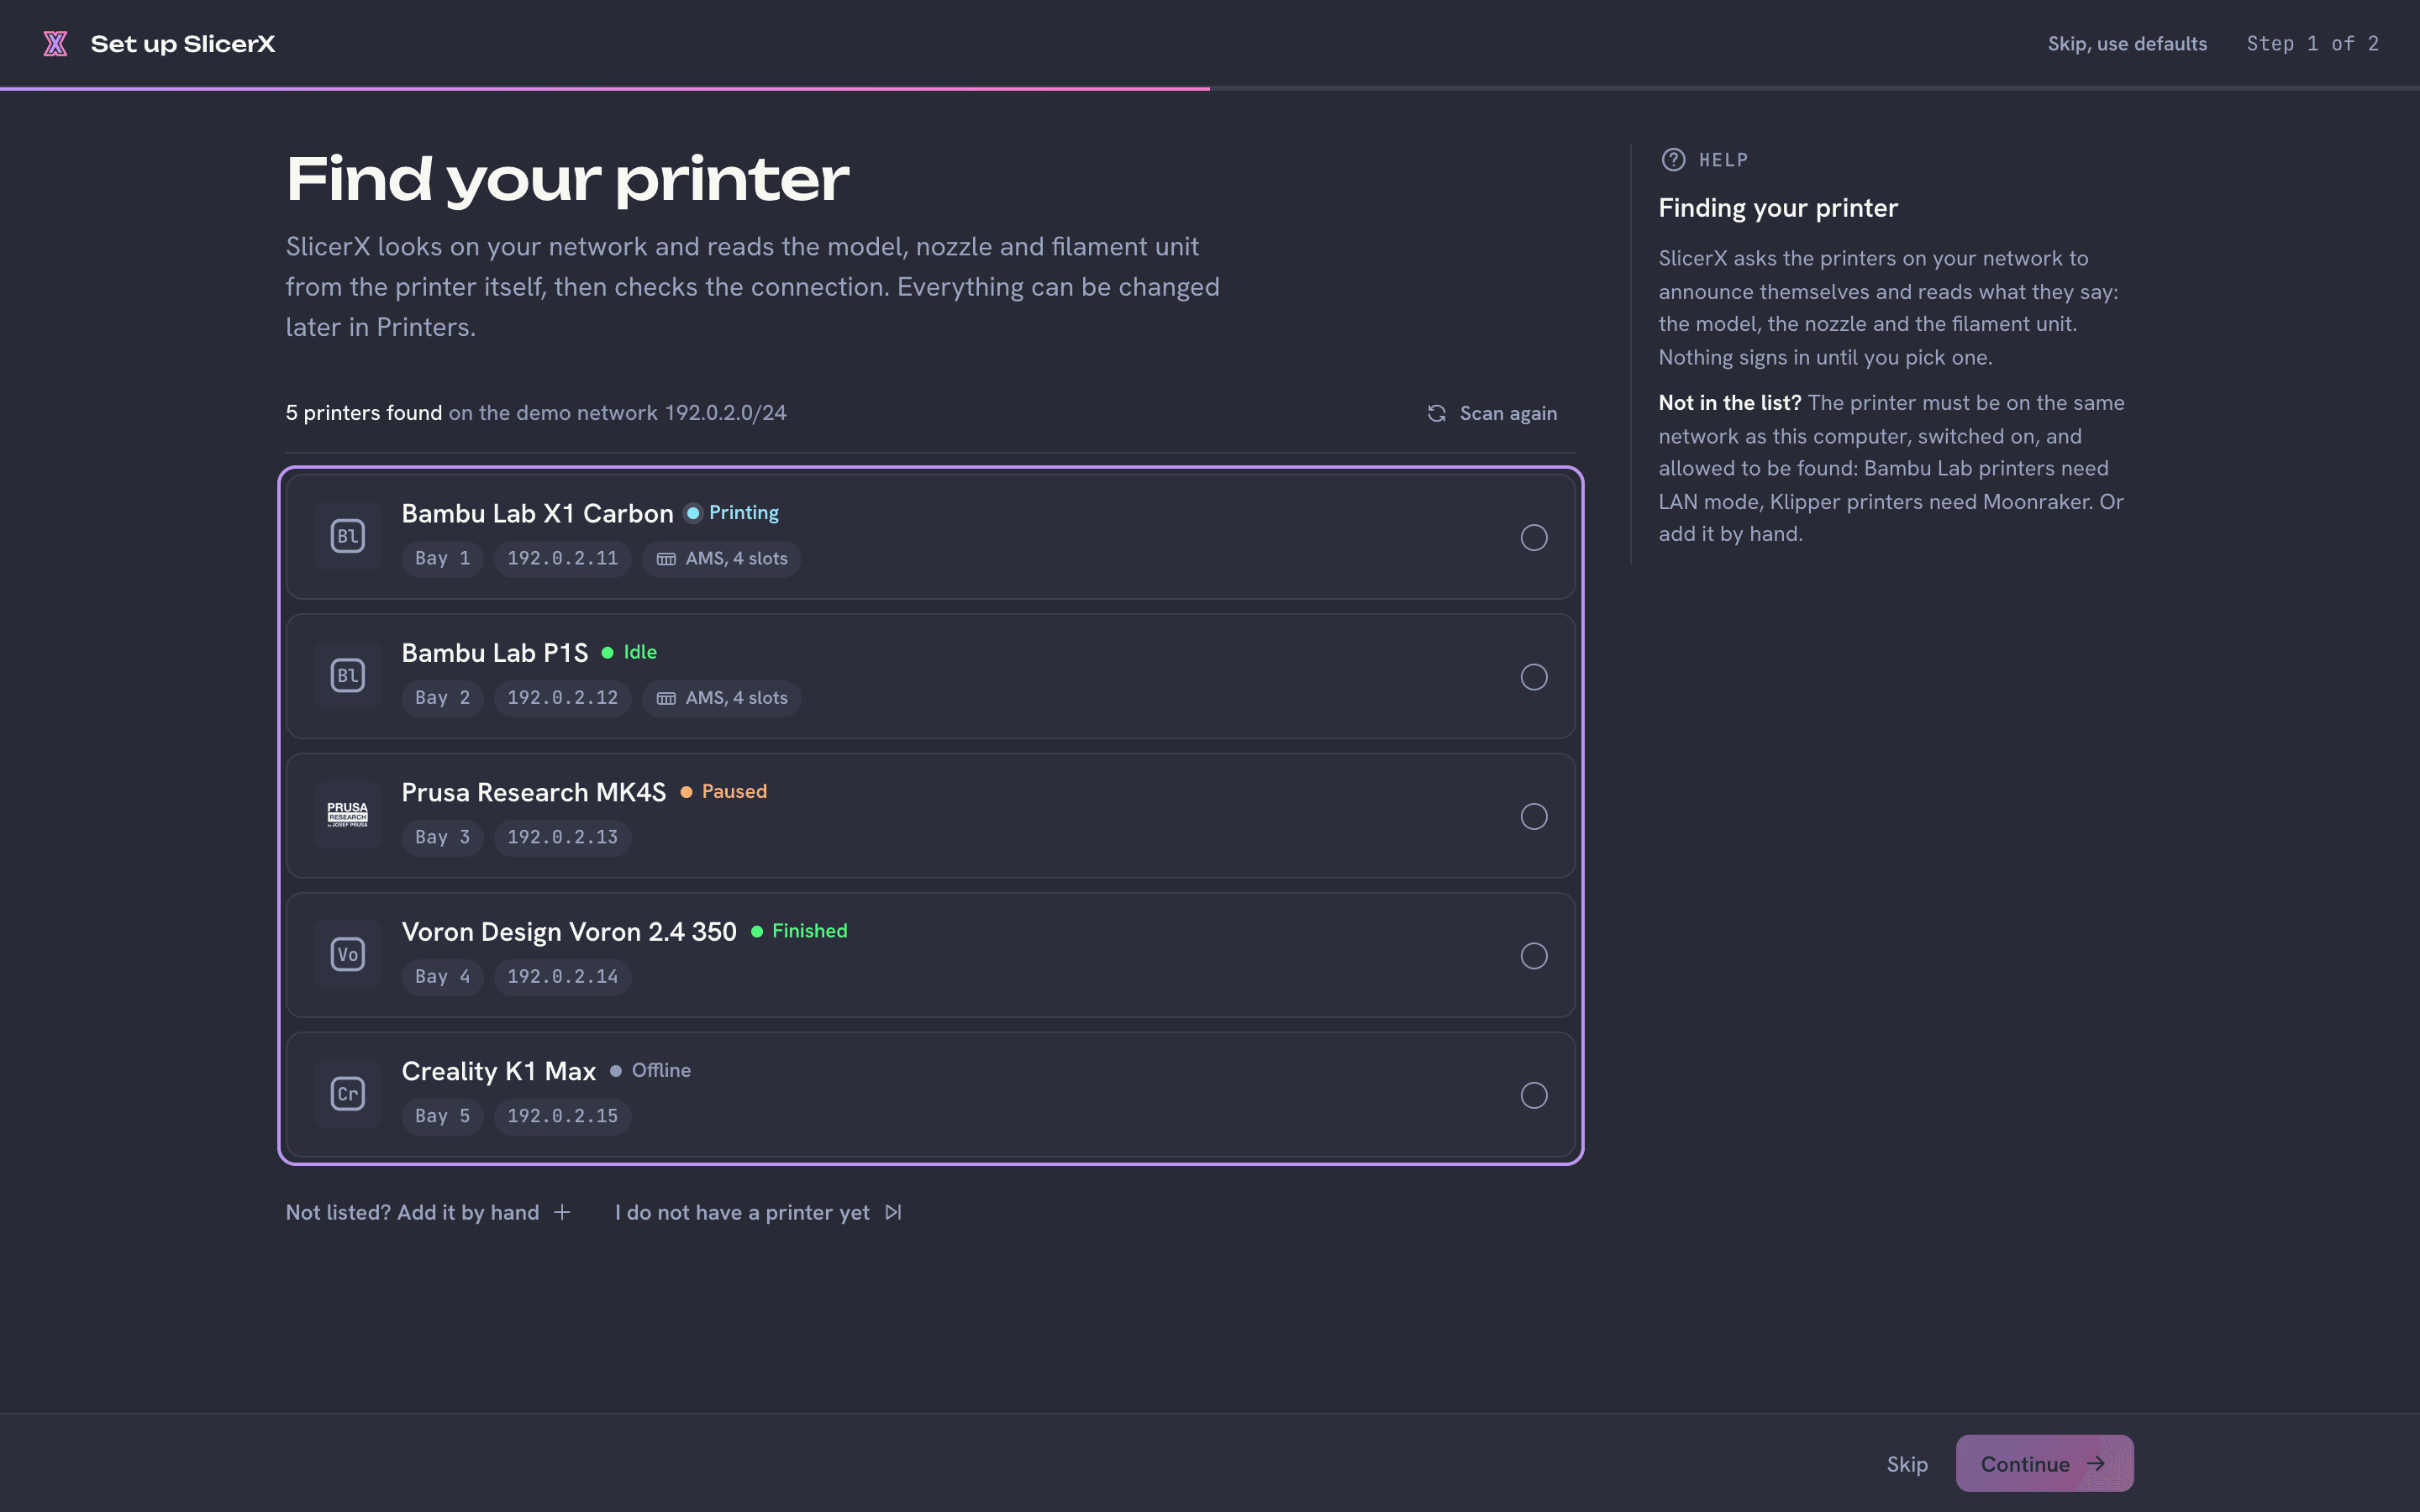
SlicerX lists the printers it finds on your network. Pick your printer and test the connection.
Click its card. SlicerX asks only for what that printer needs: for a Bambu Lab printer, its serial number and access code, which the printer shows on its screen (Where do I find this? explains). The connection test then runs by itself: Reach the printer, Sign in, Read state and Read temperatures. It reads from the printer and changes nothing on it. Access codes and keys go to your computer's keychain.
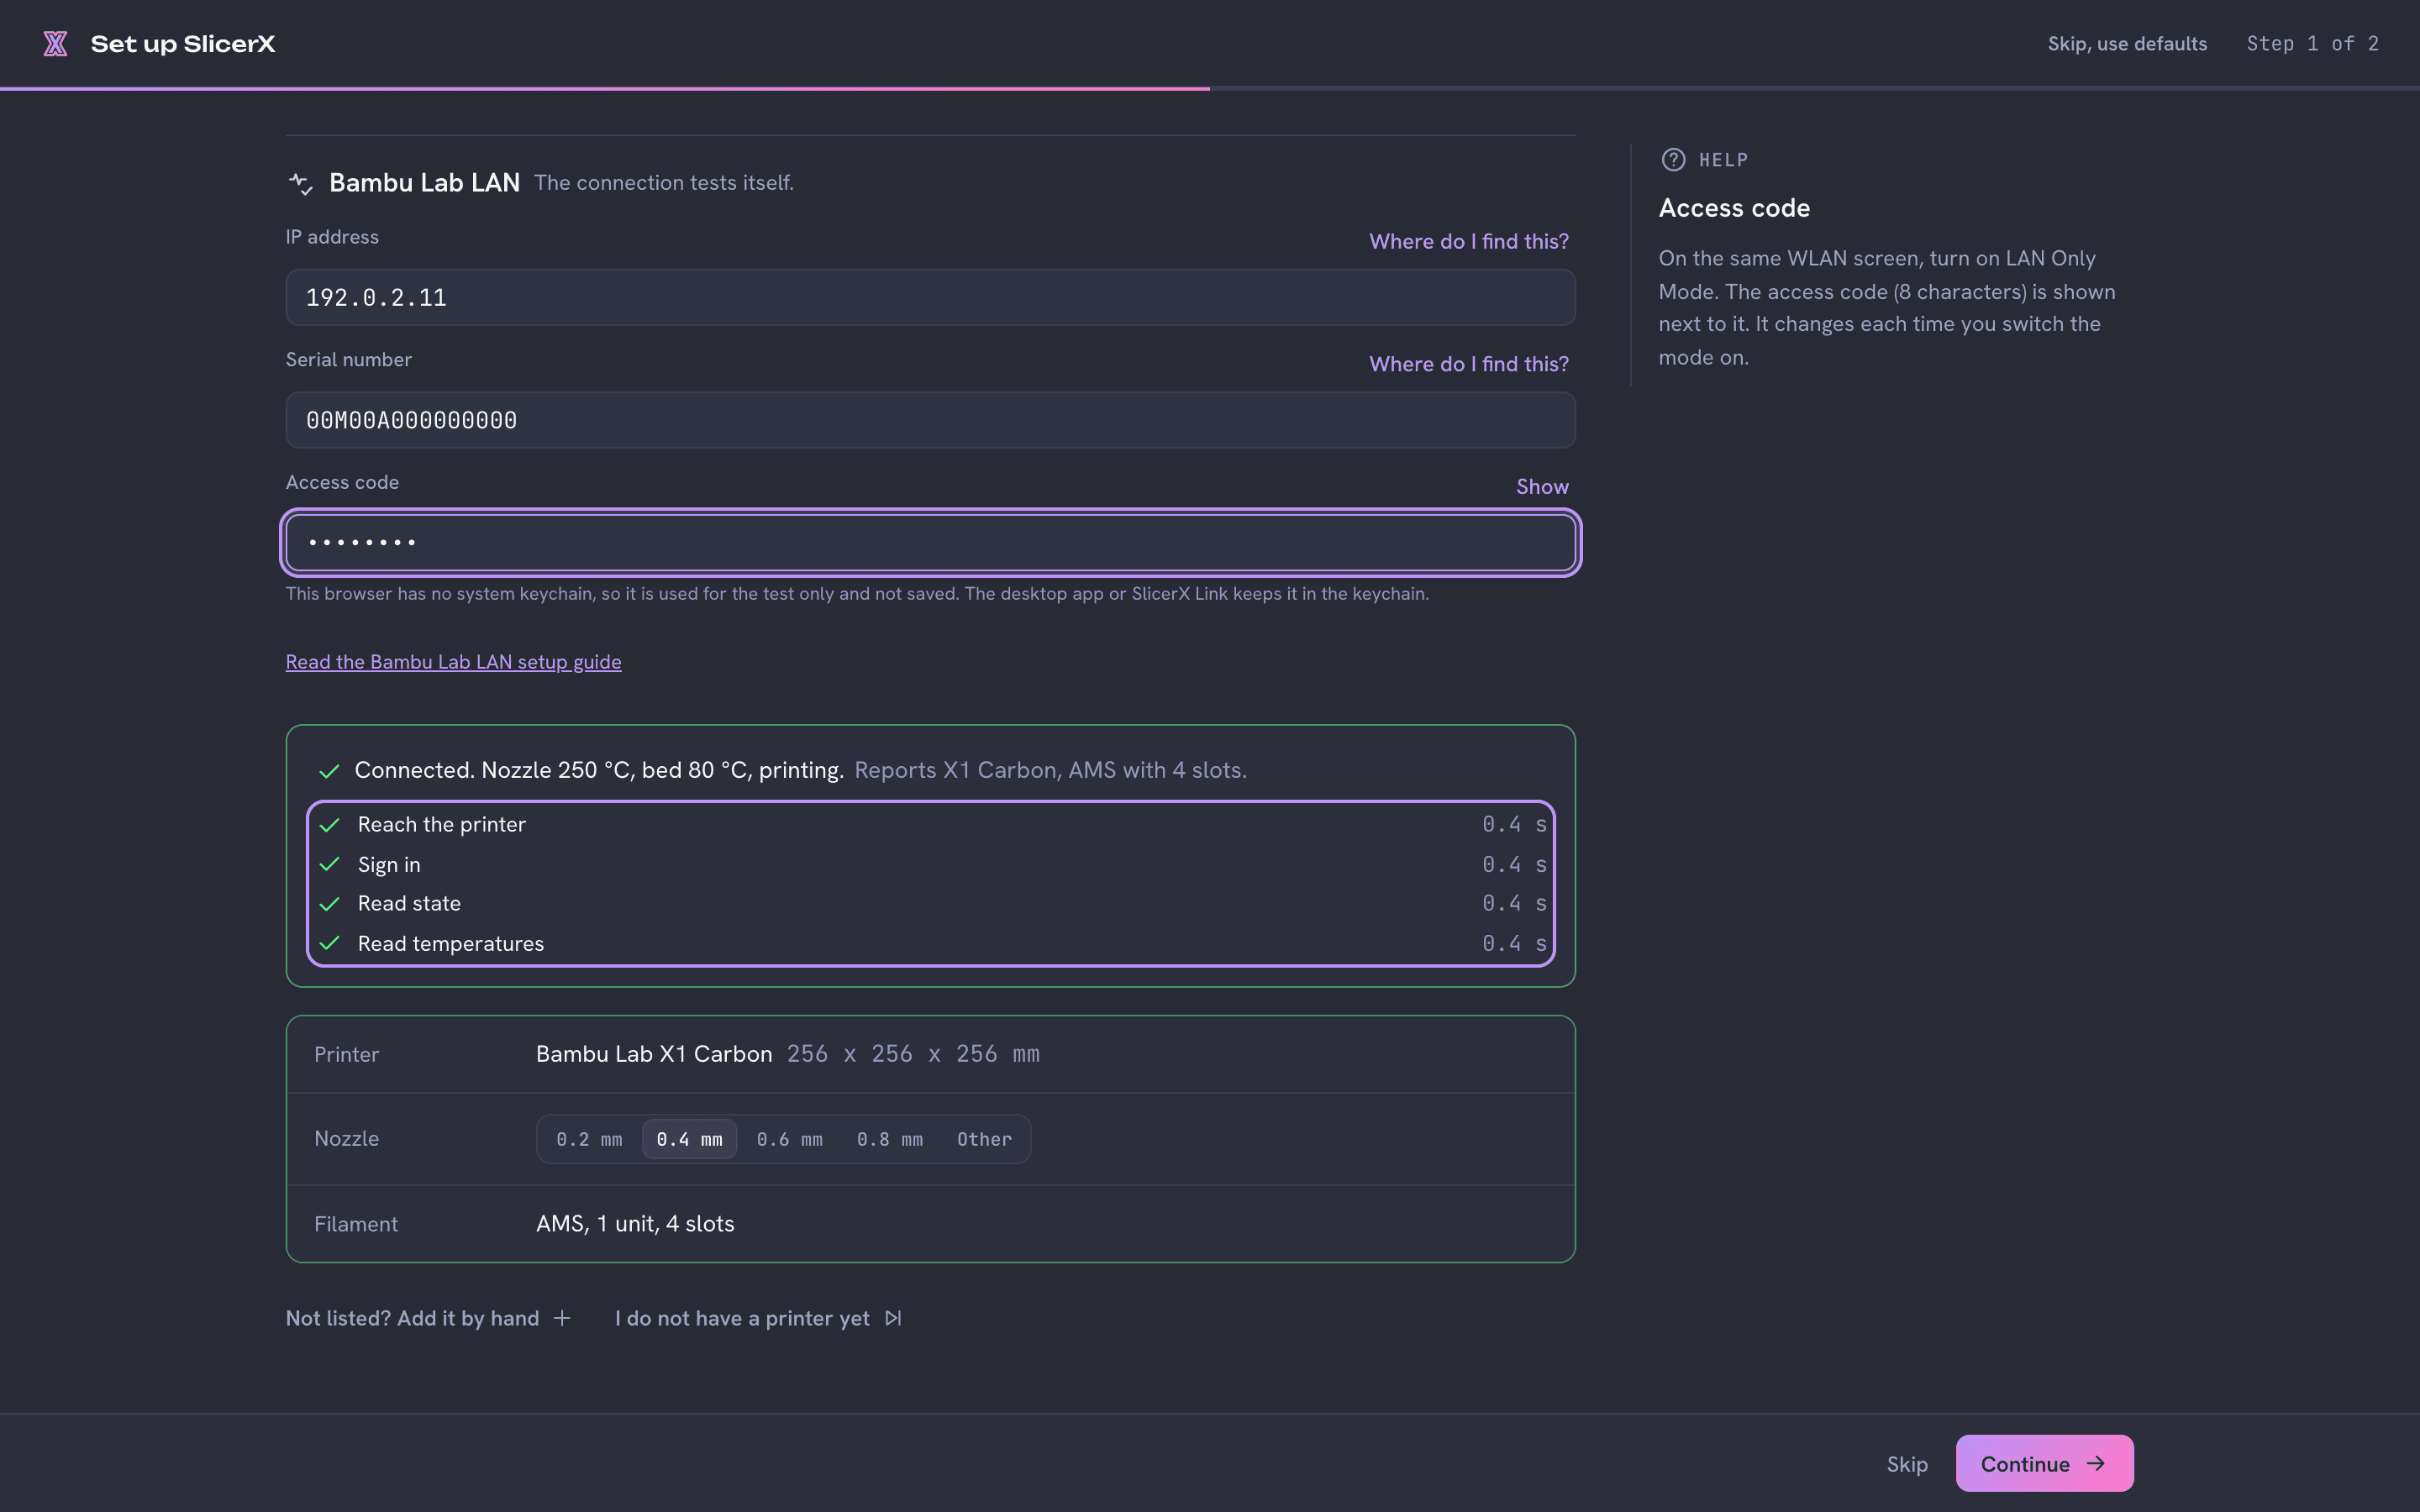
A passed test shows what SlicerX read from the printer. If a step fails, the screen says which one and what to try. Test again runs it once more, and Continue without testing adds the printer marked Not verified.
Choose how the controls behave.
The second screen asks Which slicer do you use now? Pick Bambu Studio, OrcaSlicer or PrusaSlicer and SlicerX takes on that app's mouse buttons, shortcuts and tab names, so your hands already know the way. Beside the choices, a preview of the SlicerX window in that style marks what changes with numbered notes, such as the Printers tab being called Device in Bambu Studio style, or the shortcut that slices the plate. New to slicers? Keep Something else, or none yet. The choice never changes your print settings or the G-code. If you used one of those apps, Choose preset files under Bring your presets imports your own printer, filament and process presets from it, and changes nothing in that app.
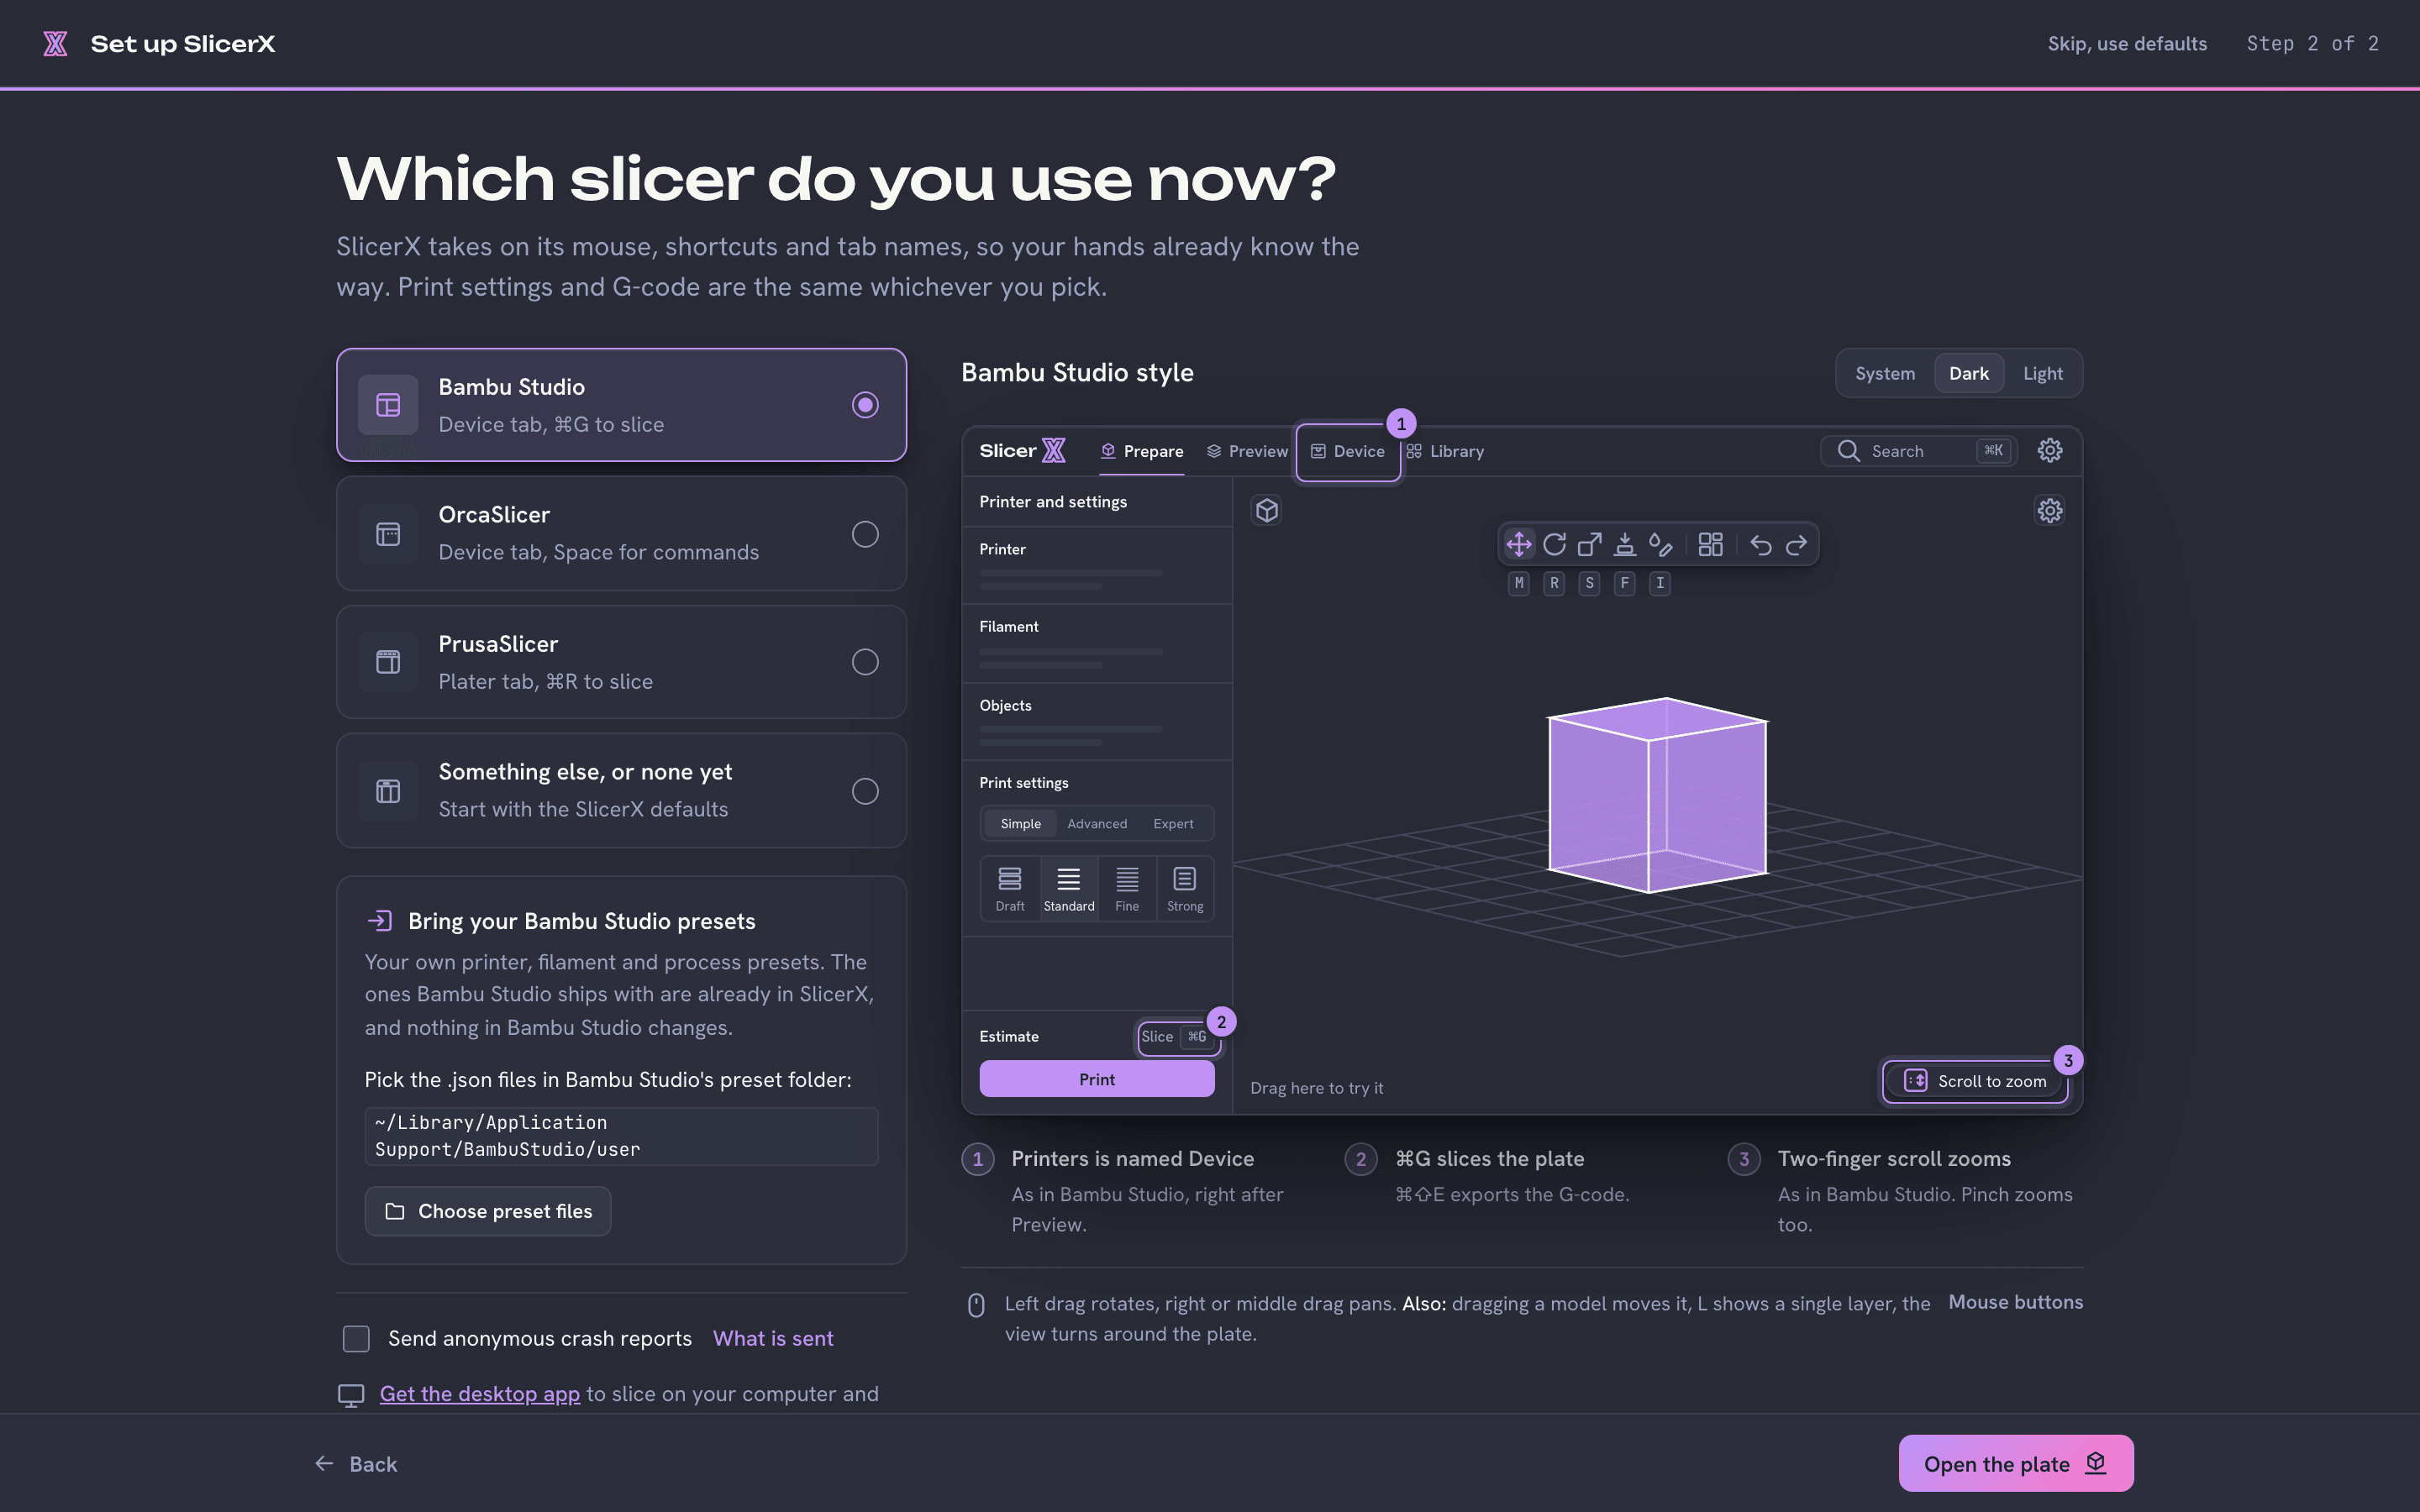
The preview shows what changes in each style. You can change it later in Settings. Open the plate.
Press Open the plate. SlicerX opens the Model workspace with an example model on the plate, so you can try everything right away. The plate is your printer's bed, drawn to size. The tabs across the top are the steps of a print: Model, Preview, Library and Printers. If you picked Bambu Studio or OrcaSlicer controls, the first tab is called Prepare, as in those apps; with PrusaSlicer controls it is Plater.
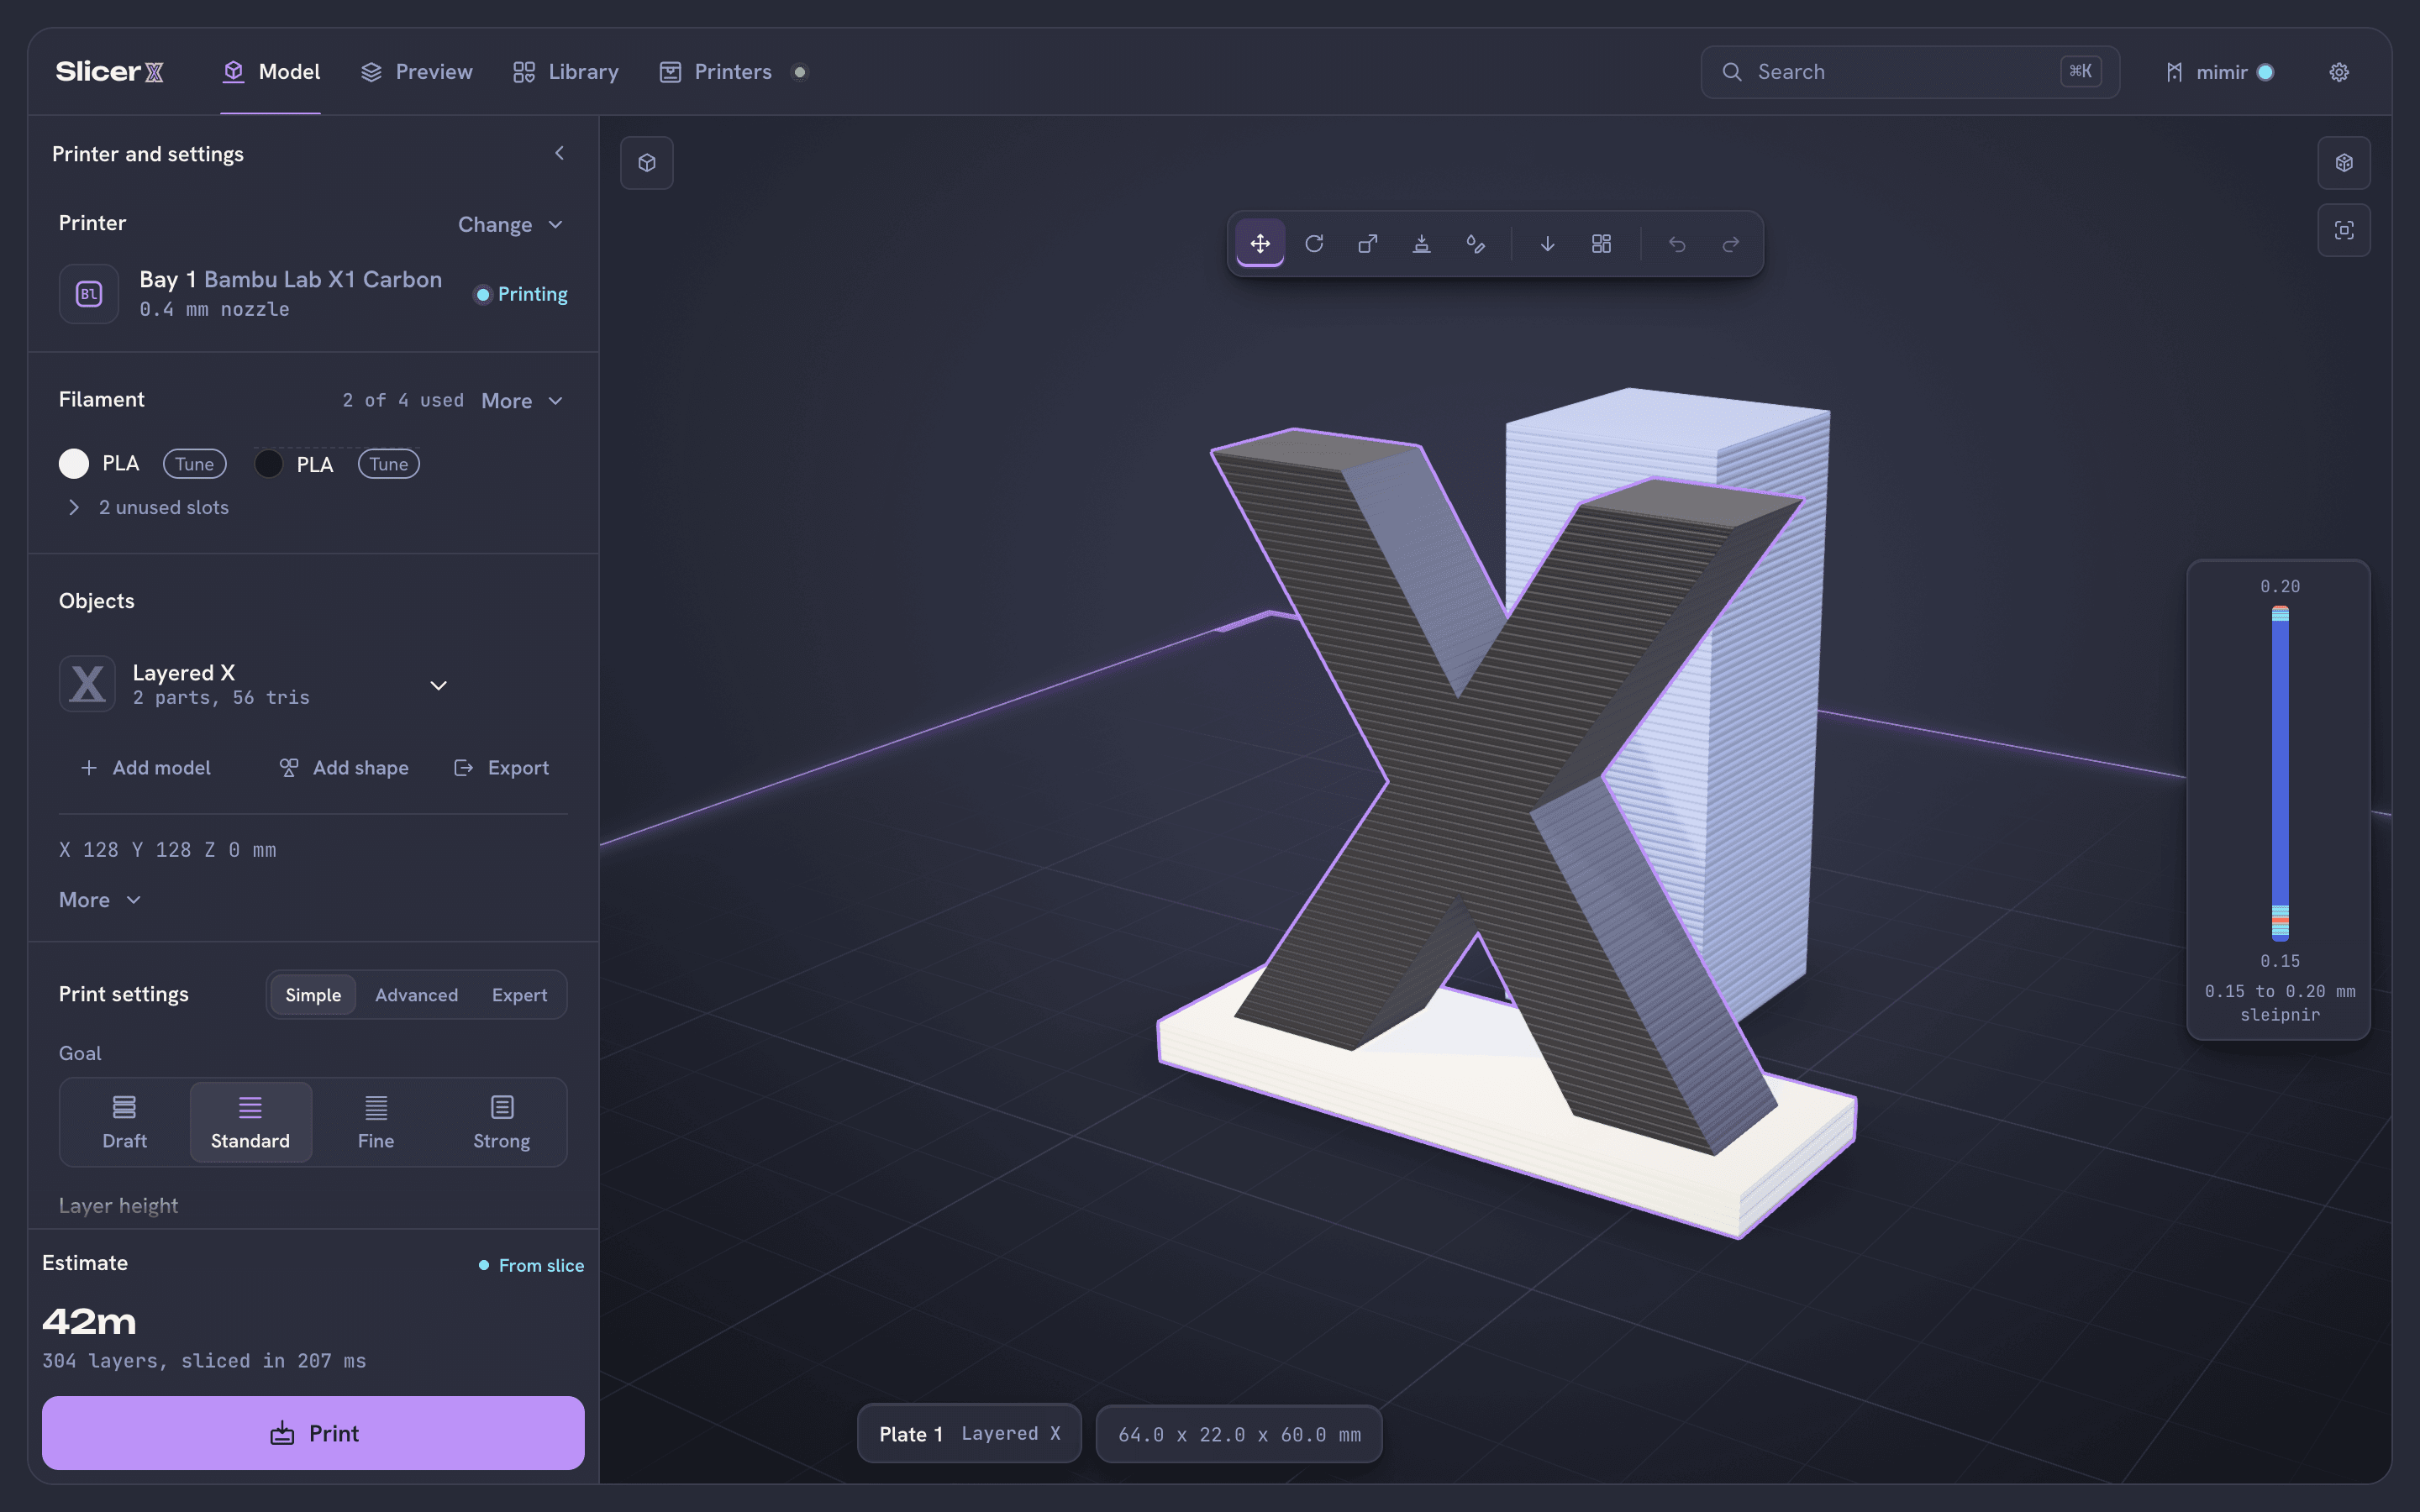
Model, with the example model on the plate.